Gaussian Splatting plugin by KIRI Engine
The Gaussian Splatting plugin by KIRI Engine is an After Effects plugin for artists, motion designers, and VFX creators who want to work with Gaussian Splat captures inside a familiar compositing workflow.
The plugin enables users to import Gaussian Splat into After Effects, use native AE 3D cameras, and art-direct the result with creative controls for color, cropping, displacement and more.

Download Gaussian Splatting plugin



after_effects_plugin_tip
Installation Notes
Most users will want to use the plugin 'as is' without any scripting or technical knowledge required.
Those instructions are given next.
For users that wish to modify or build their own version of the plugin, instructions to do are available following the Easy Installation.
Easy Installation
Windows Installation
Copy the .aex plugin files into the After Effects Plug-ins folder.
The default Windows location is usually:
The current plugin package may include:
Windows
- Kiri_GaussianSplatting.aex
- Kiri_PlyImporter.aex
After copying the plugin files, restart After Effects.
macOS Installation
Copy the .plugin plugin files into the After Effects Plug-ins folder.
The default macOS location is usually:
The current plugin package may include:
- Kiri_GaussianSplatting.plugin
- Kiri_PlyImporter.plugin
After copying the plugin files, restart After Effects.
If macOS blocks the plugin from loading, you may need to allow the plugin in macOS security settings. This behavior depends on the macOS version and how the plugin was packaged.
Developer's Build
Download
Requirements
Common
- CMake 3.5 or newer.
- C++20 compiler.
- Python 3 interpreter. Kiri_GaussianSplatting uses Python to generate shader headers during build.
- Adobe After Effects SDK under extern/AESDK.
- Third-party dependencies are expected to be available through git submodules in extern/.
Windows
- Visual Studio / MSVC toolchain.
- cl must be available for preprocessing .r resource files.
- Windows graphics dependencies are built from submodules: glad and glfw.
- The build generates .aex plug-ins.
macOS
- Xcode.
- macOS deployment target is set to 11.0.
- Universal build is configured for arm64;x86_64.
- Homebrew LLVM is required by Kiri_PlyImporter through brew --prefix llvm.
- rez must be available for PiPL/resource generation.
- macOS graphics/system dependencies include Cocoa, OpenGL, and metal-cpp.
- The build generates .plugin bundles.
Build
macOS
Windows
Then open Kiri_AE_3DGS.xcodeproj / Kiri_AE_3DGS.sln , select the Release configuration, and run ALL_BUILD to build the project.
Only the Release build products are currently expected to run correctly in After Effects.
After building , you should put the following products into your local AE plugins folder.
The default AE plugin path is as follows:
The default log file path is as follows:
Quick Start: Your First Splat In After Effects
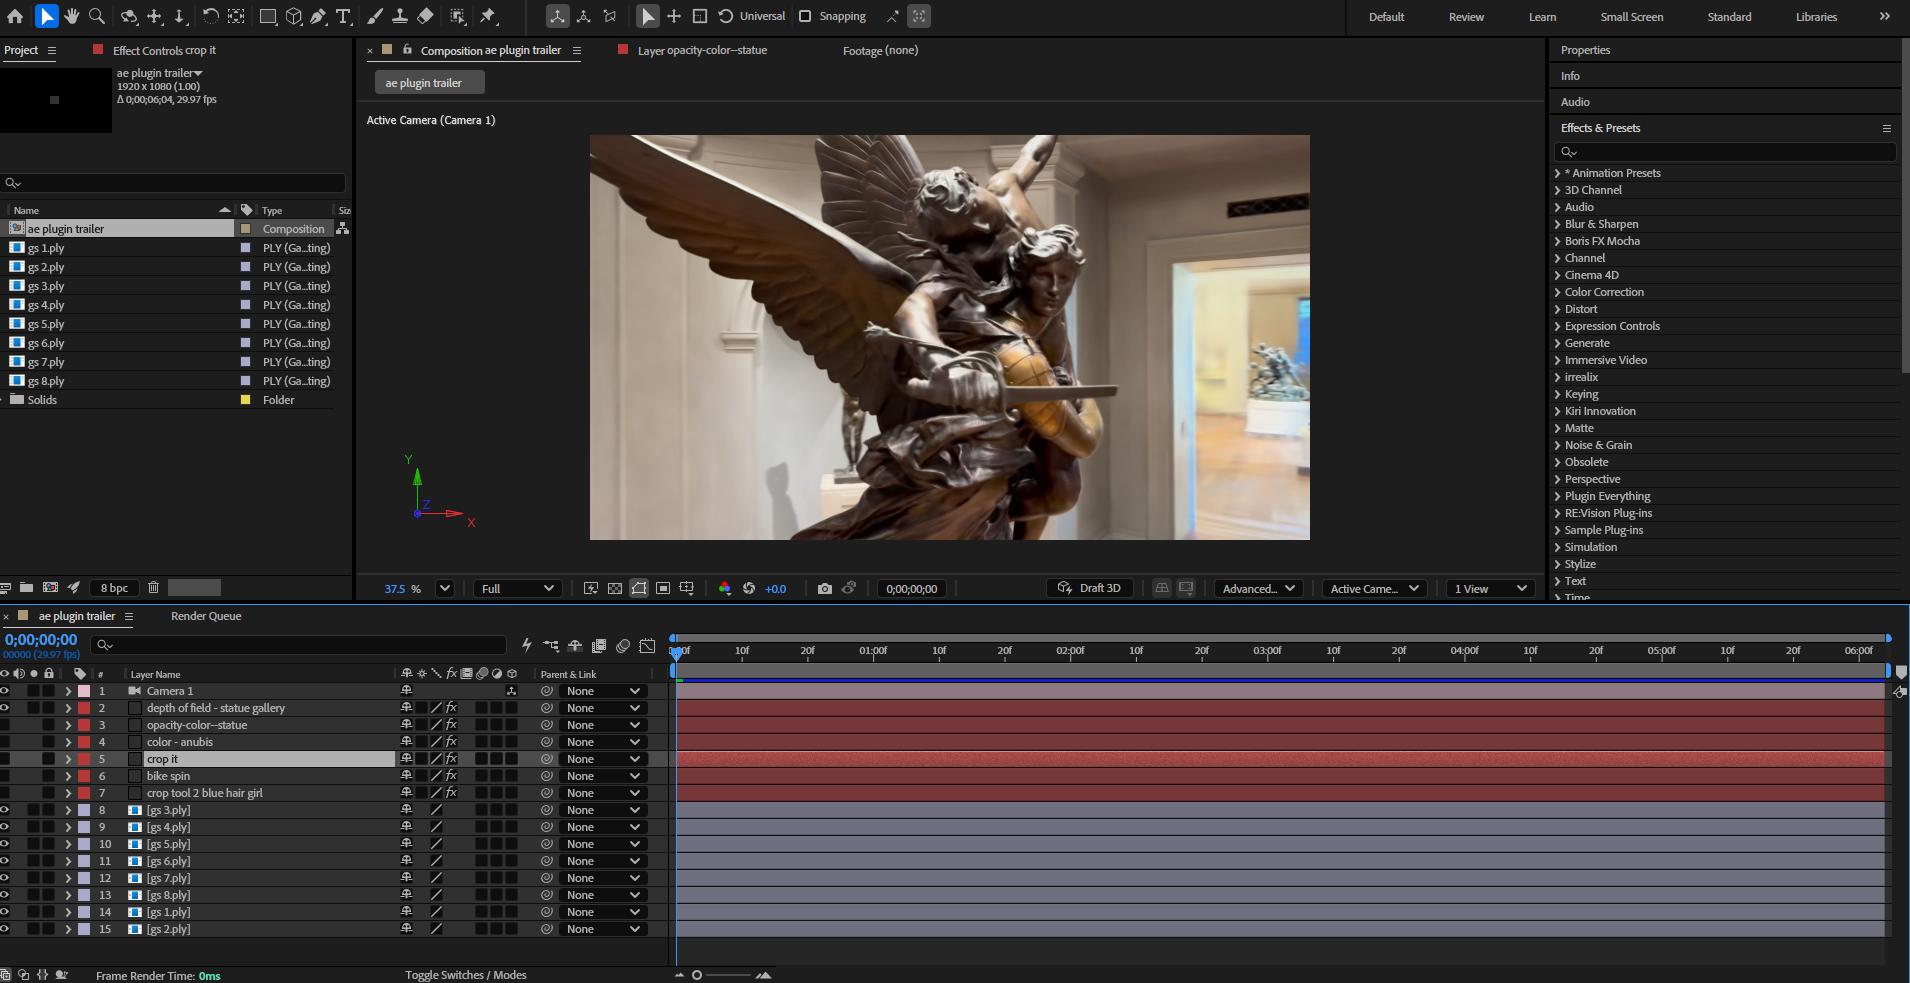
This quick start walks through the basic setup: create a comp, add the effect, select your splat file, and view it through an AE camera.
Step 1: Create A Composition
Create a new After Effects composition.
Choose the resolution, frame rate, and duration you want for your shot. For a first test, use a normal comp size such as 1920 x 1080 so it is easy to preview.
Step 2: Add A Solid Layer
Create a new solid layer.
This solid will hold the KIRI_GaussianSplatting effect. The solid itself is just a host layer; the plugin will render the splat scene through the effect.
Step 3: Add A Camera
Create a new After Effects camera.
The plugin is designed to work with AE camera movement, so a camera is needed for viewing and animating the splat scene.
Step 4: Import A Splat File
Import your Gaussian Splat .PLY file into the After Effects project.
After importing it, add the splat footage to the composition stack.
You can turn off the footage layer visibility since you are only using it as the source for the plugin.
Step 5: Apply The Effect
Select the solid layer.
In the Effect Controls panel, apply the KIRI_GaussianSplatting effect.
It should appear under the Kiri Innovation plugin category.
Step 6: Select The Splat Footage
In the KIRI_GaussianSplatting effect controls, find Select Footage.
Choose the imported splat footage from the dropdown.
This tells the plugin which splat scene to render.
Step 7: Align And Frame The Splat
Use the Align and Transform controls to place the splat in the shot.
If the scene appears too large, too small, rotated incorrectly, or outside the camera view, start with the Align controls first, then use Transform controls for creative placement.
Step 8: Add A Simple Camera Move
Animate the AE camera to create a basic flythrough, orbit, push-in, or reveal.
Once the scene is visible and framed correctly, you can begin styling it with color, crop, opacity, noise, displacement, density, Invert Sphere, and Glow controls.
Interface Overview
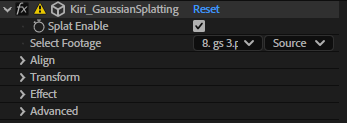
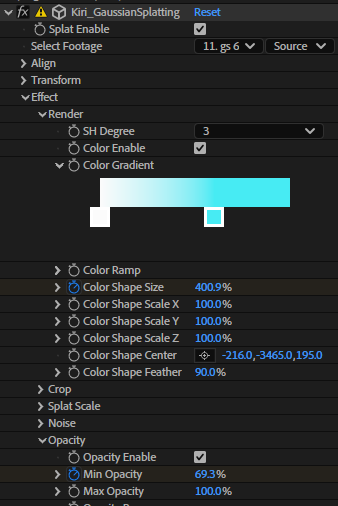
The plugin interface is organized around a few main areas:
- Splat Enable
- Select Footage
- Align
- Transform
- Effect
- Advanced
Each area controls a different part of the workflow, from selecting the splat source to styling the final look.
Splat Enable
Splat Enable turns the splat render on or off.
Use this as a quick visibility switch while setting up the scene, comparing before and after looks, or checking whether the plugin is active.
Select Footage
Select Footage chooses the imported splat source that the plugin should render.

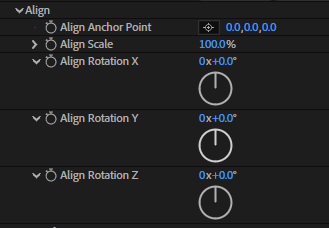
Align
The Align section is used to correct the base position, scale, and rotation of the imported splat scene.
Use Align when the splat first comes in and needs to be corrected before creative animation.
For example, the scan may appear rotated, offset, too large, too small, or facing the wrong direction.
Align is best thought of as "setup correction" transforms.
Align Anchor Point
Moves the base anchor point of the splat scene.
Use this when the scene needs to be shifted into a better starting position before applying normal transforms.
Align Scale
Adjusts the base scale of the imported scene.
Align Rotation X, Y, And Z
Rotates the imported scene on each axis.
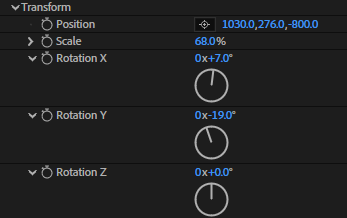
Transform
The Transform section is used to place and animate the splat in the composition.
After the scene is aligned, use Transform controls the way you would use normal creative placement controls: position, scale, and rotation.
Transform is best thought of as the "shot placement" as opposed to the align settings correction transforms.
Position
Moves the splat scene in the composition.
Scale
Changes the overall size of the splat scene.
Use this for creative shot framing once the scene has been roughly corrected with Align Scale.
Rotation X, Y, And Z
Rotates the splat scene in the composition.
Effect
The Effect section contains the main creative styling tools.
These controls let you change the look and behavior of the splat scene.
The main effect groups are:
- Render
- Crop
- Scale
- Noise
- Opacity
- Displacement
- Density
- Invert Sphere
Advanced
The Advanced section contains extra controls for camera feel, visibility range, depth of field, and Glow.
Feature Guide
Render And Color
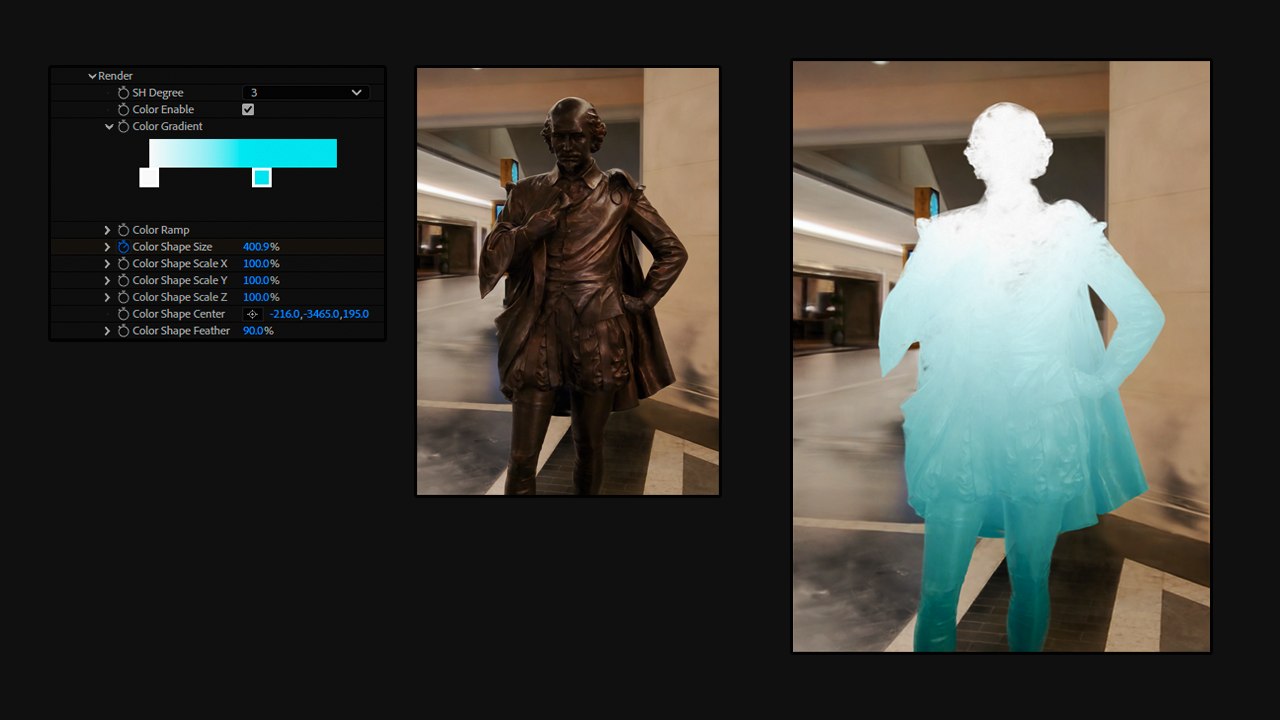
The Render section controls the base look of the splat and allows custom color styling.
Use this section when you want to preserve the scan's original look, recolor the scan, create stylized gradients, or turn realistic capture into graphic artwork.
SH Degree
SH Degree affects how much of the splat's captured color response is used.
In artist terms, this can change how rich or detailed the original scan color appears when viewed from the camera.
For simple looks, lower settings may feel more direct. For richer captured appearance, higher settings may preserve more of the scan's original visual character.
Color Enable
Color Enable turns the plugin's custom color styling on or off.
When Color Enable is off, the splat uses its normal captured color look. When it is on, the Color Gradient, Color Ramp, and Color Shape controls can be used to recolor parts of the splat.
Color Gradient
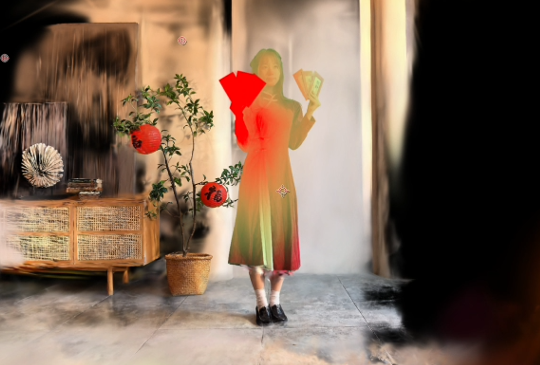
Color Gradient lets you create a custom color blend.
Selecting a square tab under the gradient bar will open a new window allowing you to select a color.
New tabs can be added to the gradient by double clicking in the space below the gradient bar.
Ctrl/Cmd + left click can be used to remove tabs.
The maximum number of tabs allowed is 20. The minimum required number of tabs is 2.

Color Ramp
Color Ramp controls how strongly the color effect appears across the selected area.
In simple terms:
- The gradient controls the colors.
- The ramp controls how those colors fade in and out.
Color Shape Controls
The Color Shape controls - Shape Size, X, Y, Z and center location - define where the color effect appears in 3D space.
These controls let you position and shape the area affected by the color treatment. This makes it possible to recolor only part of a scan instead of changing the entire scene at once.
Crop
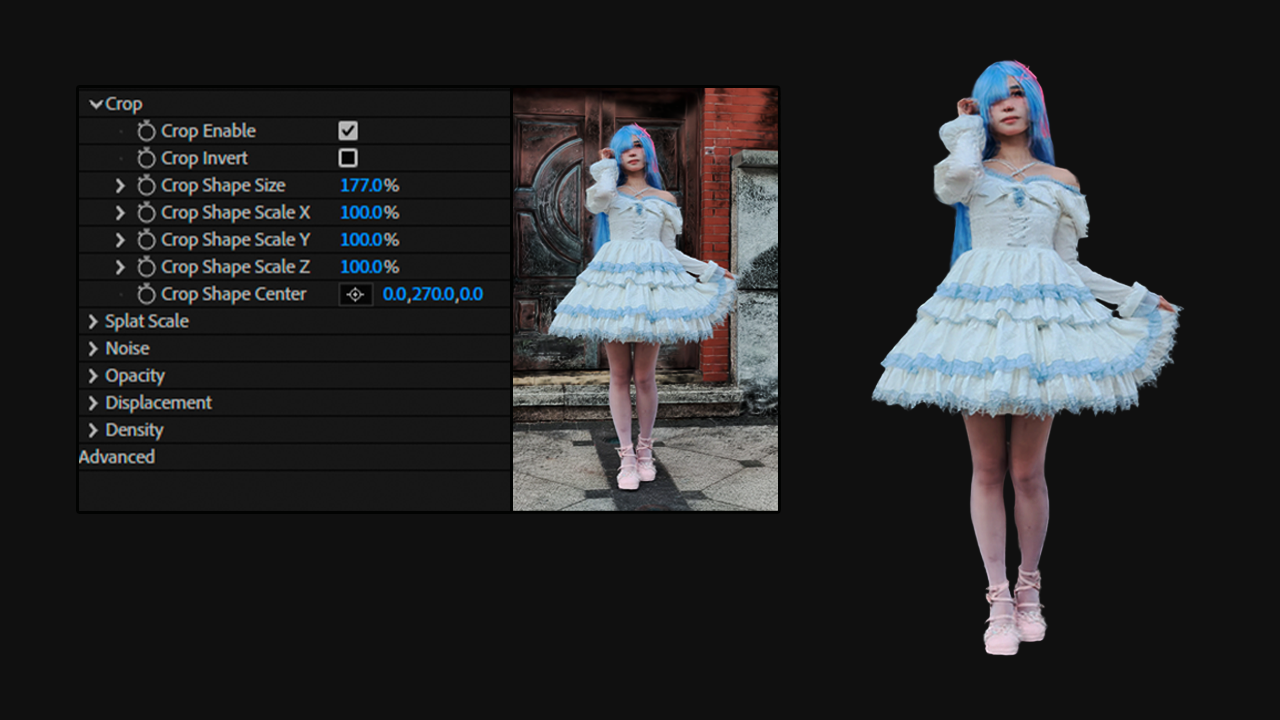
Crop hides or reveals parts of the splat using a 3D area.
Use this when you want to isolate part of a scan, remove unwanted areas, or create a reveal effect.
Crop Enable
Turns the crop effect on or off.
Crop Invert
Switches which side of the crop area is visible.
This is useful when you want to alternate between hiding the inside of the crop area and hiding the outside.
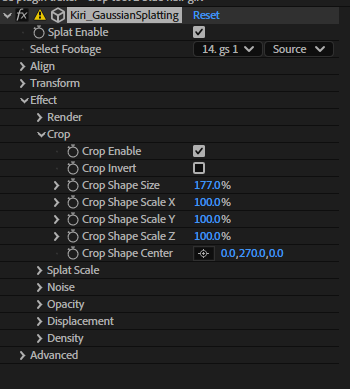
Crop Shape Controls
The Crop Shape controls - Shape Size, X, Y, Z and center location - define the size, scale, and center of the crop area.
Use these controls to place the crop region around the part of the scan you want to hide or reveal.
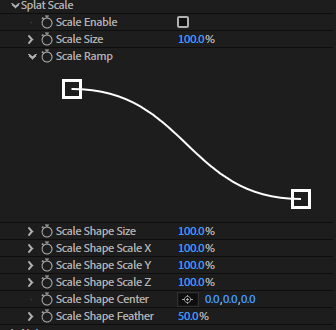
Splat Scale
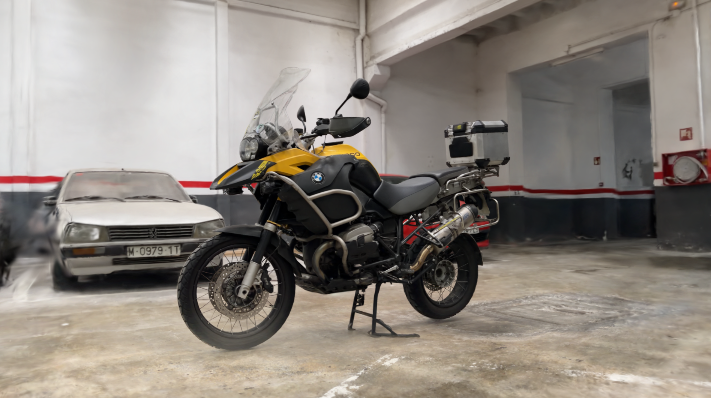
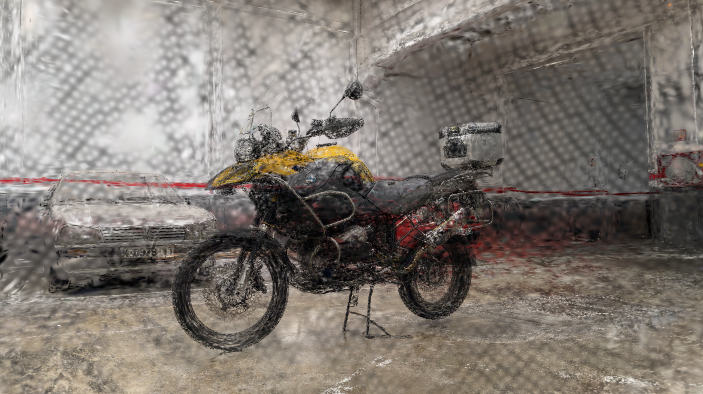
Splat Scale changes the size and visual feel of splats in a selected area.
This can make parts of the scan feel softer, chunkier, sharper, more abstract, or more particle-like.
Scale Enable
Turns the scale effect on or off.
Scale Size
Controls how large or small the affected splats become.
Use this to push the scan toward a more visible point-based or particle-like look.
Scale Ramp
Controls how the scale effect fades through the selected area.
Use this to create a soft scale transition instead of a sudden change.
Scale Shape Controls
The Scale Shape controls - Shape Size, X, Y, Z and center location - define where the splat scaling happens.
Use these controls to affect only part of the scene, such as the center of an object, the edge of a scan, or a region moving through the scene.
Noise
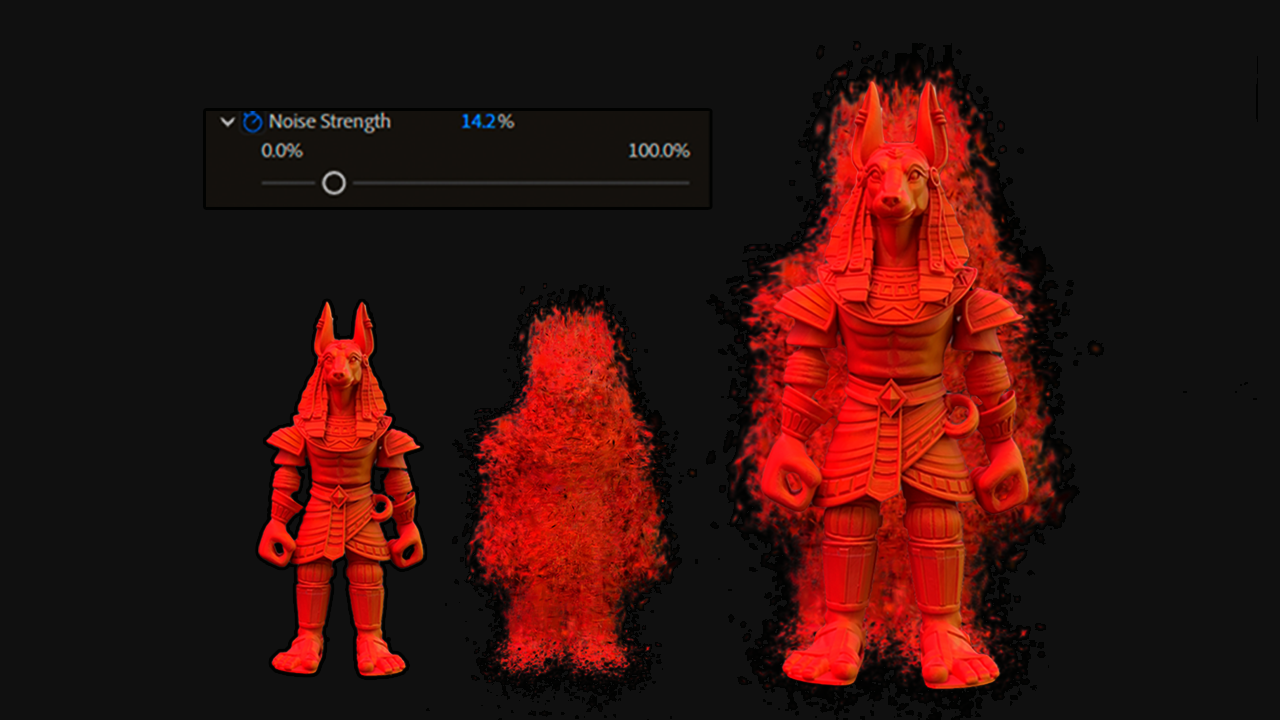
Splat Noise adds organic distortion and motion-like variation to the splat.
This is one of the most expressive creative sections. It can make a scan shimmer, ripple, glitch, break apart, or feel alive.
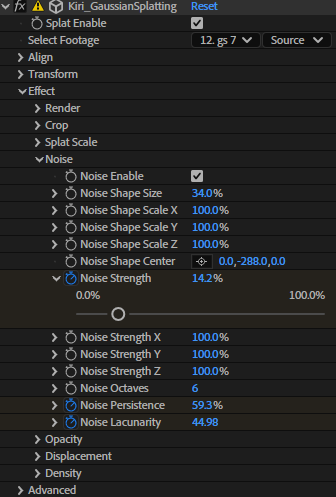
Noise Enable
Turns the noise effect on or off.
Noise Shape Controls
The Noise Shape controls - Shape Size, X, Y, Z and center location - define where the noise effect appears.
Use these controls to localize the noise so only part of the splat becomes unstable or animated.
Noise Strength
Controls the overall strength of the noise effect.
Higher values create stronger distortion. Lower values create more subtle motion.
Noise Strength X, Y, And Z
Controls the direction of the noise effect.
Use these controls to push the distortion more horizontally, vertically, or in depth.
Noise Octaves
Controls the detail level of the noise.
Lower values can feel simpler and smoother. Higher values can feel more detailed and turbulent.
Noise Persistence
Controls how much smaller noise detail remains visible.
Use this to shape whether the noise feels smooth or layered.
Noise Lacunarity
Controls the spacing and frequency feel of the noise.
Use this to adjust whether the noise feels broad and slow or more detailed and active.
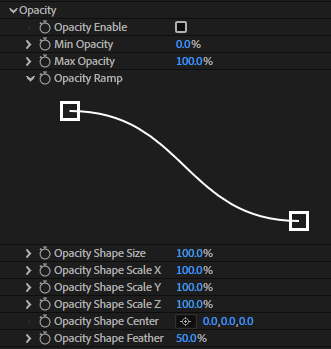
Opacity
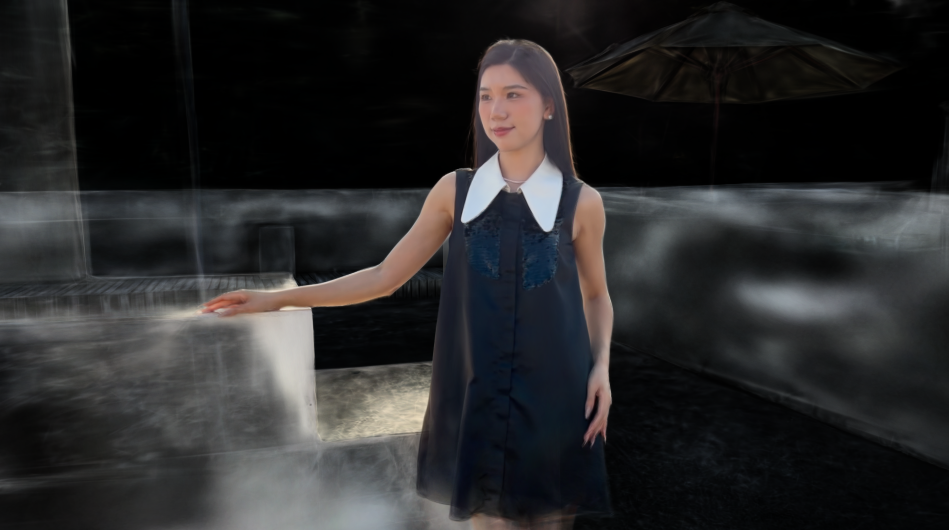
Splat Opacity fades parts of the splat in or out.
Use this when you want transparent, ghostly, dissolving, or soft reveal effects.
Opacity Enable
Turns the opacity effect on or off.
Min Opacity
Sets the lowest opacity level for the affected area.
Use this to prevent the splat from disappearing completely, or set it low for a more dramatic fade.
Max Opacity
Sets the highest opacity level for the affected area.
Use this to control how solid the visible part of the splat can become.
Opacity Ramp
Controls how the opacity fades through the selected area.
Use this to create soft transitions, hard fades, or stylized transparency effects.
Opacity Shape Controls
The Opacity Shape controls - Shape Size, X, Y, Z and center location - define where the opacity effect appears.
Use these controls to fade only part of the scan rather than the entire scene.
Displacement
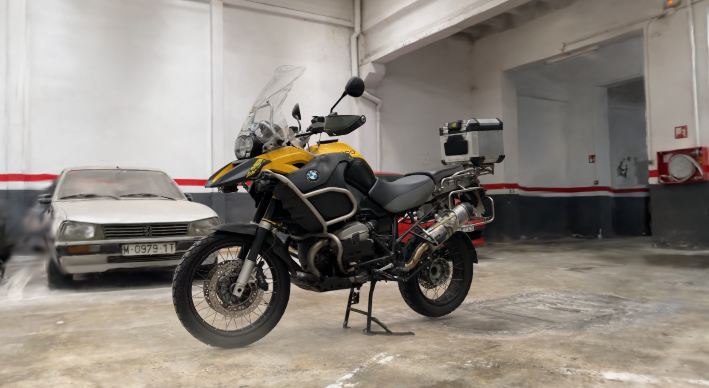
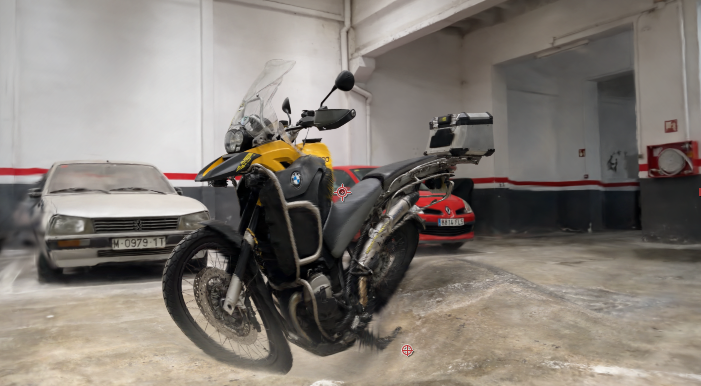
Splat Displacement pushes, scales, or rotates areas of the splat.
This section is useful for creating warps, pulls, spatial bends, explosion-like transitions, and animated transformation effects.
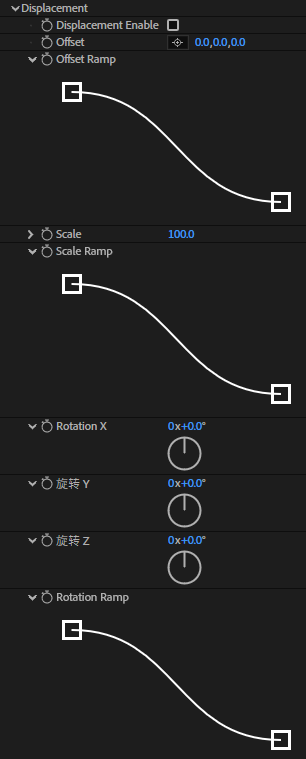
Displacement Enable
Turns the displacement effect on or off.
Displacement Offset
Moves the affected splats away from their original position.
Use this to push part of the scan outward, pull it in a direction, or create a separation effect.
Displacement Offset Ramp
Controls how the offset fades through the selected area.
Use this to make the displacement feel soft and gradual instead of abrupt.
Displacement Scale
Scales the affected area of the splat.
Use this to make part of the scene expand, shrink, or pulse.
Displacement Scale Ramp
Controls how the scale displacement fades across the selected area.
Displacement Rotation X, Y, And Z
Rotates the affected area of the splat.
Use this for twisting, bending, or turning parts of the scan.
Displacement Rotation Ramp
Controls how the rotation effect fades through the selected area.
Displacement Shape Controls
The Displacement Shape controls - Shape Size, X, Y, Z and center location - define where the displacement happens.
Use these controls to isolate the effect to one part of the scan.
Density
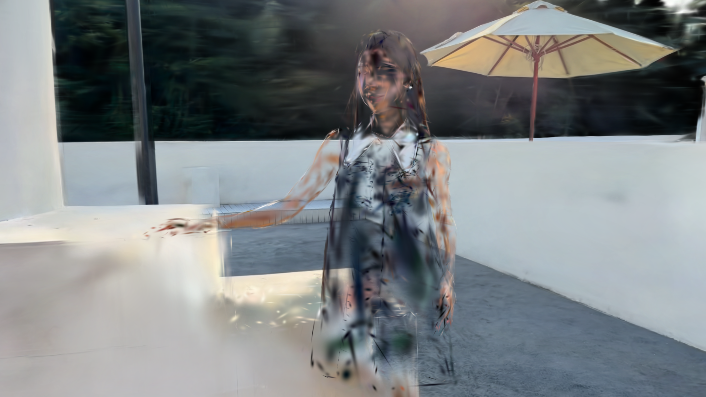
Splat Density controls how dense or sparse the splat appears in a selected area.
Use this to thin out parts of the scan, create particle-like breakup, or build digital-decay effects.
Density Enable
Turns the density effect on or off.
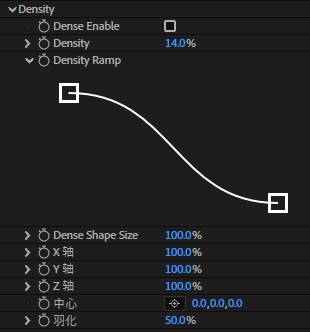
Density
Controls how much of the splat remains visible in the affected area.
Lower density can create a sparse, dissolving, or broken-up look. Higher density keeps more of the original scan visible.
Density Ramp
Controls how the density effect fades through the selected area.
Use this to create smooth density transitions or more graphic breakup effects.
Density Shape Controls
The Density Shape controls - Shape Size, X, Y, Z and center location - define where the density effect appears.
Use these controls to thin out one region while leaving the rest of the scan intact.
Invert Sphere
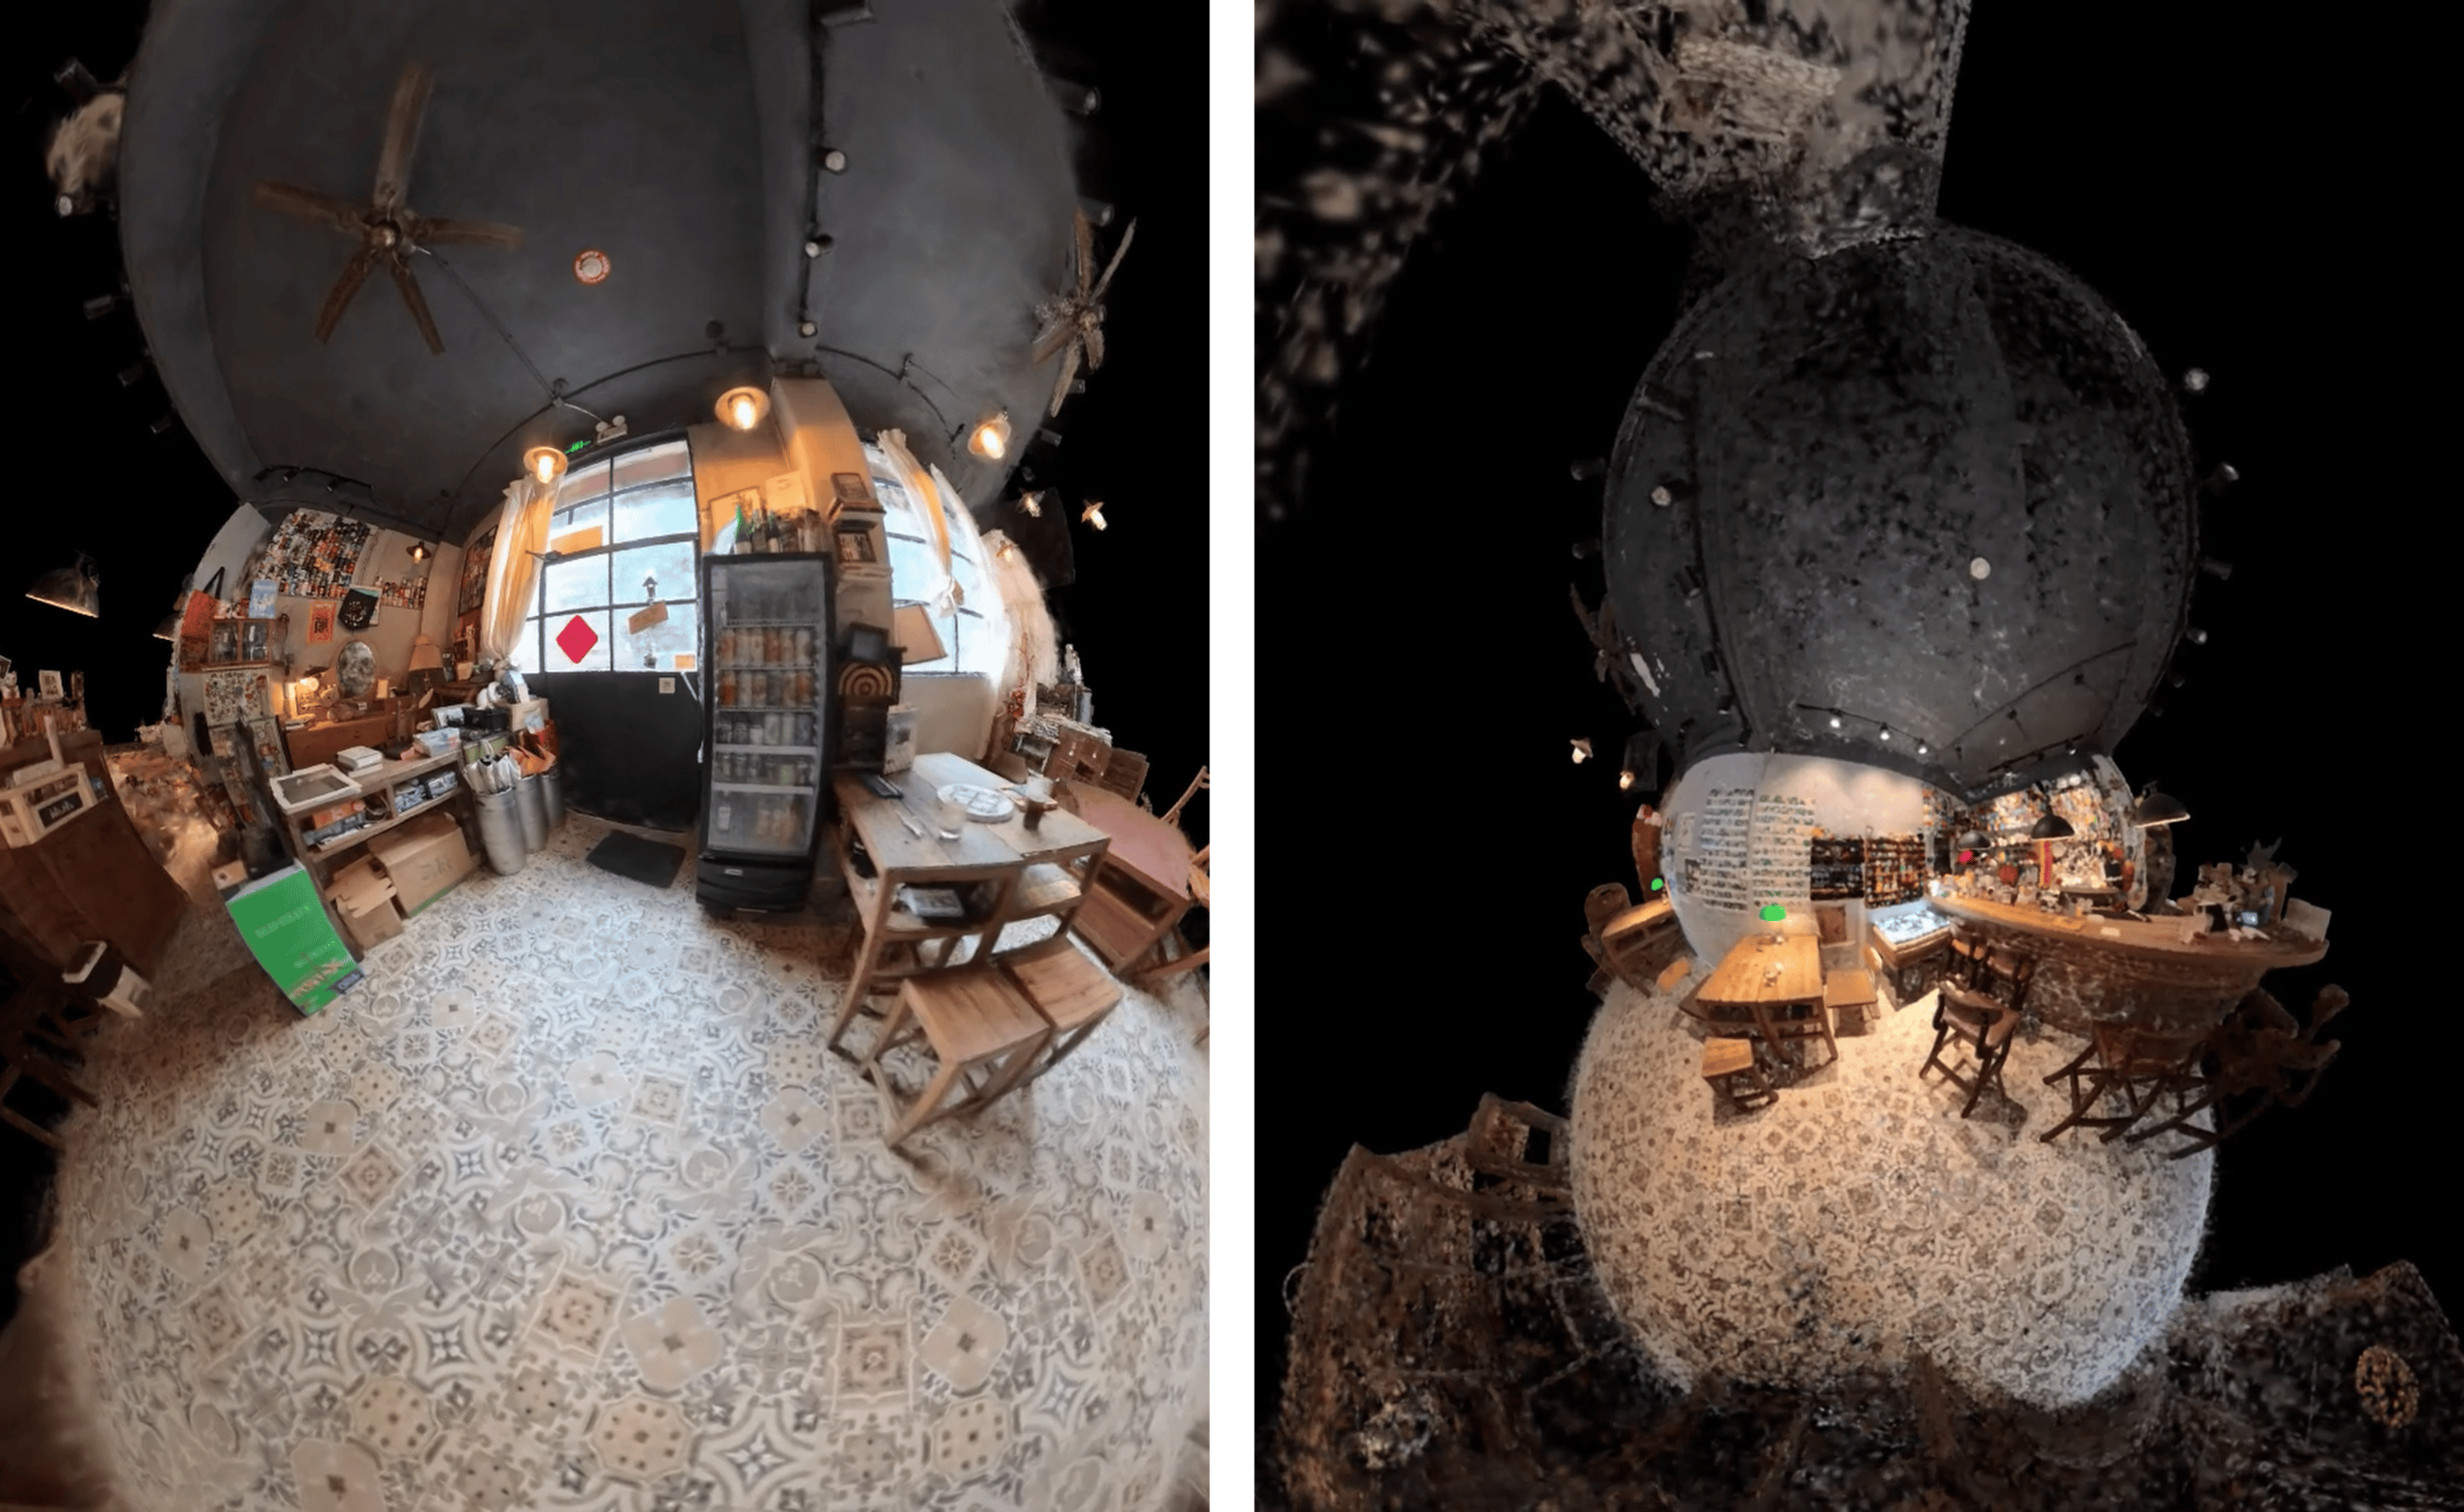
Invert Sphere is a 3D radial deformation that turns the splat scene inside out around a movable center.
The effect remaps splats along lines radiating from the selected Center.
Use it to create spherical wraps, tunnel-like forms, planet effects, expanding reveals, and abstract inside-out transitions.
Because Invert Sphere changes both splat position and apparent splat size, small adjustments can create a strong visual change.
Enable
Turns the Invert Sphere effect on or off.
Center
Sets the center of the spherical deformation in 3D space.
Splats are repositioned according to their distance and direction from this point. Move or animate Center to make the deformation travel through the scan.
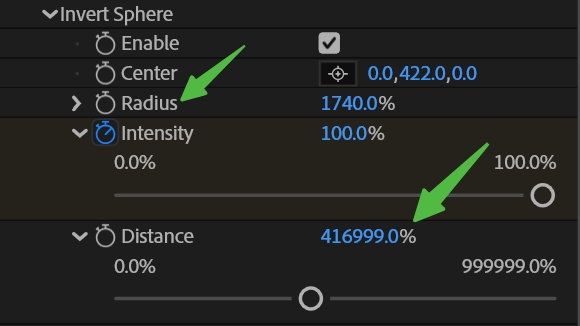
Radius
Sets the radius of the inversion sphere.
At full Intensity, splats located on this radius remain at the same radial distance, while splats inside and outside the radius are redistributed around it.
Use Radius to control the primary size and pivot of the spherical warp.
Intensity
Controls how strongly the original scene is blended into the inverted result.
At 0%, the splats remain in their original positions. At 100%, the complete spherical deformation is applied.
Animate Intensity to transition smoothly between the original scan and the inverted form.
Distance
Sets the outer reference distance used by the spherical remapping.
Distance has a strong influence on how the splats are distributed through the effect. At full Intensity, splats at the specified Distance are pulled toward the Center, while splats nearer the Radius are wrapped around the spherical surface.
For a more predictable result, keep Distance much larger than Radius.
Compression
Controls how tightly splats are packed along the radial deformation.
Higher values concentrate more of the warped scene near the spherical surface and can reduce extreme radial stretching. Lower values preserve a more open, direct inversion.
Use Compression after establishing the Center, Radius, and Distance.
Practical Tips
Start with relatively small splats while adjusting Invert Sphere. If necessary, reduce Splat Scale > Scale Size in the affected region.
Keep Radius much smaller than Distance:
If Radius and Distance are too close, the deformation can change very abruptly. Begin with a low Intensity, establish the relationship between Radius and Distance, then increase Intensity and adjust Compression.
The exact percentages will depend on the scale of the imported scan, so treat this relationship as more important than copying specific values.
Advanced
The Advanced section provides extra controls for camera feel, visibility range, depth of field, and Glow.
Most users should begin with the normal setup controls first. Use Advanced when the splat is visible but does not feel correctly framed or matched to the camera.
Camera Focal Length
Adjusts the camera feel used by the plugin.
Use this if the splat perspective feels too wide, too tight, or mismatched with the composition.
Splat Crop Near
Controls how close splats can be before they are hidden.
Use this if parts of the splat are too close to the camera or creating unwanted near-camera artifacts.
Splat Crop Far
Controls how far splats can be before they are hidden.
Use this if very distant parts of the scene need to be removed or if the visible range needs adjustment.
Splat Crop Max Scale And Min Scale
These controls help filter splats by their size.
Use them when certain splats appear too large, too small, or visually distracting. These are more advanced cleanup controls and may not be needed in a normal first setup.
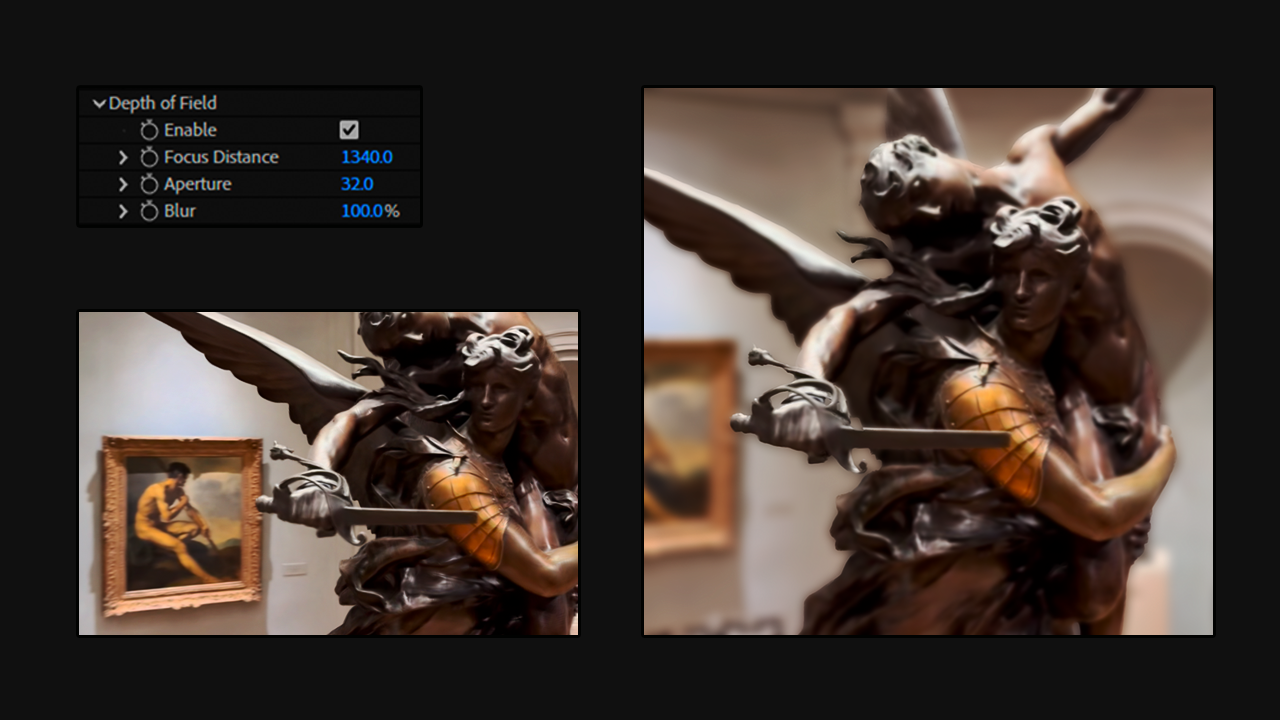
Depth of Field
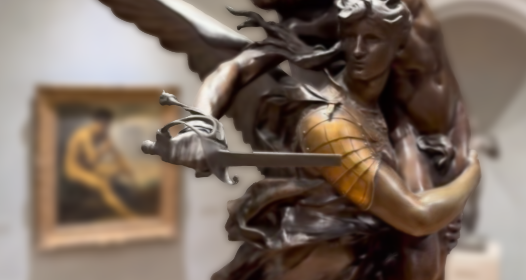
Areas of the splat can be blurred depending on their distance from the camera - simulating camera lens blur
Depth of Field Enable
Turns the depth of field effect on or off.
Focus Distance
Sets the focal point by distance from the active camera.
Aperture
Controls how deep or shallow the depth of field is. The values do not correspond to camera fStops, a higher value creates a shallow depth of field (more blur).
Blur
Adjust the total strength of blur in out of focus areas.
Glow


Glow creates a soft bloom around bright areas of the rendered splat.
Use it to produce illuminated, dreamlike, neon, energetic, or holographic looks. Glow is a screen-space finishing effect; it does not act like a 3D light or cast light onto other parts of the scene.
The glow color comes from the rendered splats. Use the Render and Color controls if you want to change the color feeding into the Glow effect.
Enable
Turns Glow on or off.
Blend Mode
Controls how the generated glow is combined with the original splat render.
- Add adds the glow directly to the original image. It produces the strongest and brightest result, but can also create very intense highlights.
- Screen produces a softer blend that generally preserves more detail in bright areas.
Screen is a useful starting point for a natural bloom effect. Use Add for stronger energy, neon, or overexposed looks.
Radius
Controls how far the glow spreads from its source.
Lower values create a tighter glow close to the bright splats. Higher values produce a wider, softer halo.
Threshold
Controls which brightness levels contribute to the glow.
Lower values restrict the effect to the brightest areas. Higher values allow a broader range of the rendered image, including dimmer splats, to contribute.
Adjust Threshold until the intended parts of the scan generate glow.
Smooth
Softens the transition around the Threshold.
Lower values create a harder separation between glowing and non-glowing areas. Higher values produce a smoother, more gradual transition.
Practical Tips
Start with the Screen blend mode and adjust Threshold until only the intended areas contribute. Next, use Smooth to refine the transition and Radius to control the spread.
Switch to Add when you want a brighter or more energetic result. If too much of the scan glows, reduce Threshold or use the Render and Color controls to create greater separation between bright and dark regions.
Troubleshooting / FAQs
The Splat Does Not Appear
Check the following:
- Splat Enable is turned on.
- The splat footage is selected in Select Footage.
- A camera exists in the comp.
- The splat is positioned in front of the camera.
- The splat layer source is available in the project.
If the scene is still not visible, try resetting the Transform values and using Align Scale to bring the scene into a manageable size.
I can't add more tabs to the color gradient
The maximum number of tabs allowed is 20.
The minimum required number of tabs is 2.
Playback Feels Slow
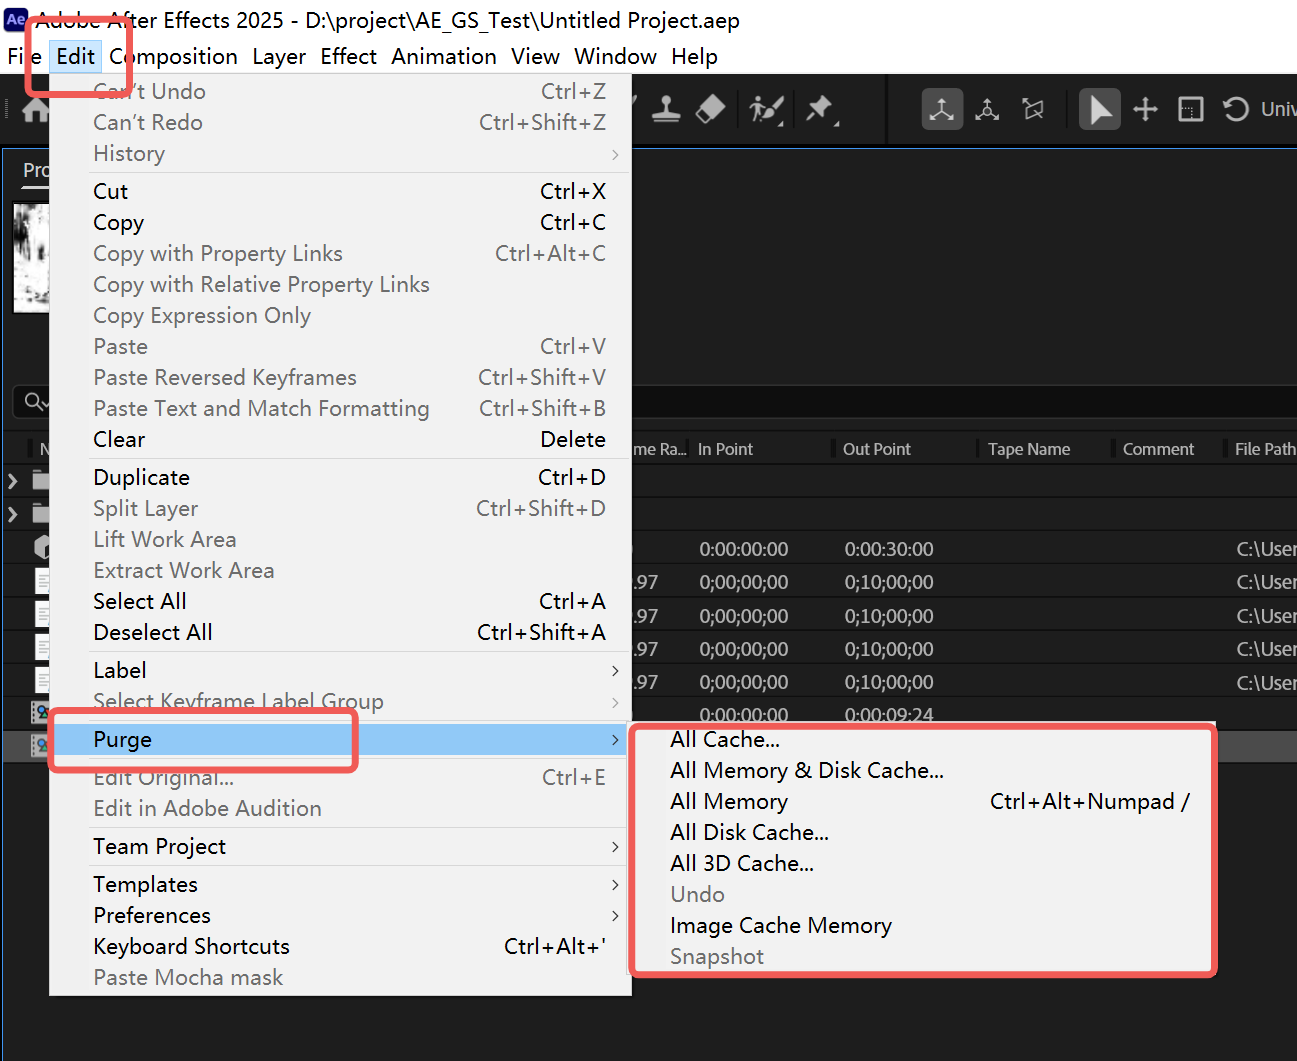
Because AE will use any memory and disk as much as it can for the frame cache, pc will quickly lag due to limited memory. This is not caused by any program memory leak.
Try to release the cache when AE starts to freeze or lag