

3D Scan Preparation Tool by KIRI Engine v1.0.0
3D Scan Prep Tool is a desktop app for preparing images, video frames, 360 footage, masks, and scan-focused image adjustments for photogrammetry and 3D scanning workflows. It is built for 3D scan enthusiasts who want an advanced tool that is still approachable: choose a source, move left to right through the columns, preview where useful, then click Run.

Download 3D Scan Preparation Tool

Please note: We are making these 3D Scan Preparation Tools available to you completely for free. :) If you like our work, the best way to support us is to download the KIRI Engine app on your phone and consider becoming a KIRI Engine Pro user.
Requirements
Windows
- Windows 10 or Windows 11, 64-bit.
- Enough free disk space for the app and generated outputs.
- The installed Windows app is roughly 6 GB on disk.
- NVIDIA GPU acceleration is optional.
- Supported NVIDIA RTX GPUs can use the CUDA-enabled Windows build.
- Unsupported GPUs and systems without compatible GPU acceleration should fall back to CPU.
- CPU fallback is slower, especially for AI masking, but should keep the app usable.
macOS / Linux
MacOS and Linux are currently supported. We may consider adding support for these in the future.
Input Files
The app can work with:
- JPG/JPEG
- PNG
- TIFF
- HEIC/HEIF
- Supported camera RAW files
- Normal video files
- 360/equirectangular video files
RAW and HEIC files may require temporary preview conversion before they can be shown in the app preview window.
Installation
Windows Installation
The Windows CUDA installer is split into several files because the full GPU-enabled app is large.
Download all Windows installer parts into the same folder:
Run:
Do not run, rename, move, or delete the .bin files during installation. They must stay beside the installer .exe .
Windows SmartScreen or antivirus software may warn about the installer if the app is not code signed. This is common for new open-source desktop apps.
Important Safety Note
Always work from a copy or backup of important source images and videos.
Some workflows can move original images into sorting or review folders. Some output settings can overwrite previously generated files. Use the app carefully, especially on large unorganized datasets or the only copy of an SD card dump.
Keep backups and test settings on a small folder first.
General Workflow
The app is designed to be used from left to right:
- Choose the source type and input/output folders in Source & Sort.
- Enable any sorting, video extraction, or session options.
- Choose whether to isolate blurry or weaker images in Sharpness.
- Choose any masks in Masks.
- Choose scan-focused image adjustments in Processing.
- Choose output behavior in Output.
- Check hardware/cache options in Settings.
- Use preview buttons where helpful.
- Click Run.
The Run button changes to Stop while processing. Most settings are locked during a run so the batch cannot be accidentally changed mid-process.
Runtime Notes show progress, warnings, and completion messages. More detailed information is available from Diagnostics or Open Tool Log.
Preview Panel
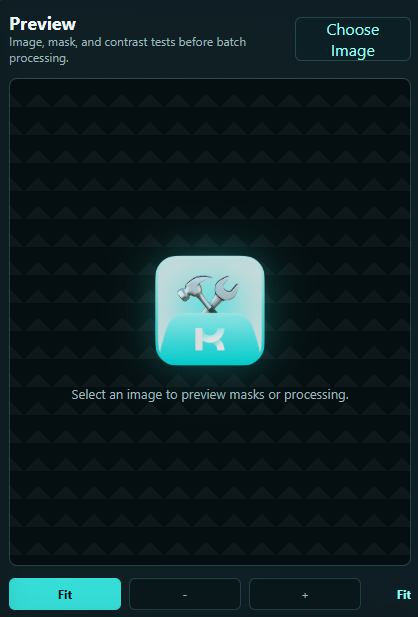
The Preview panel is used to inspect source images, mask results, and processing results before running a full batch.
Choose Image
Choose Image lets you manually pick one image for preview. For RAW files, the app creates a temporary display JPG so the image can be shown in the preview window.
For Video, Video Folder, and 360 modes, the app will grab a preview frame from the selected video source - this can take a moment.
Preview Position

For video and 360 inputs, Preview position chooses where preview frames are grabbed from:
- 0 means near the start.
- 0.5 means around the middle.
- 1 means near the end.
This affects previews only. It does not change the final extraction count or extraction positions.
Zoom and Pan
Use:
- Fit to fit the image back into the preview window.
- - to zoom out.
- + to zoom in.
- Mouse wheel over the preview to zoom.
- Click and drag while zoomed in to pan.
Runtime Notes
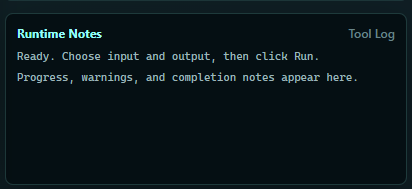
Runtime Notes show what the app is doing. If a run seems slow, check this area first. AI model loading, scene detection, 360 unwrapping, and video extraction can take time.
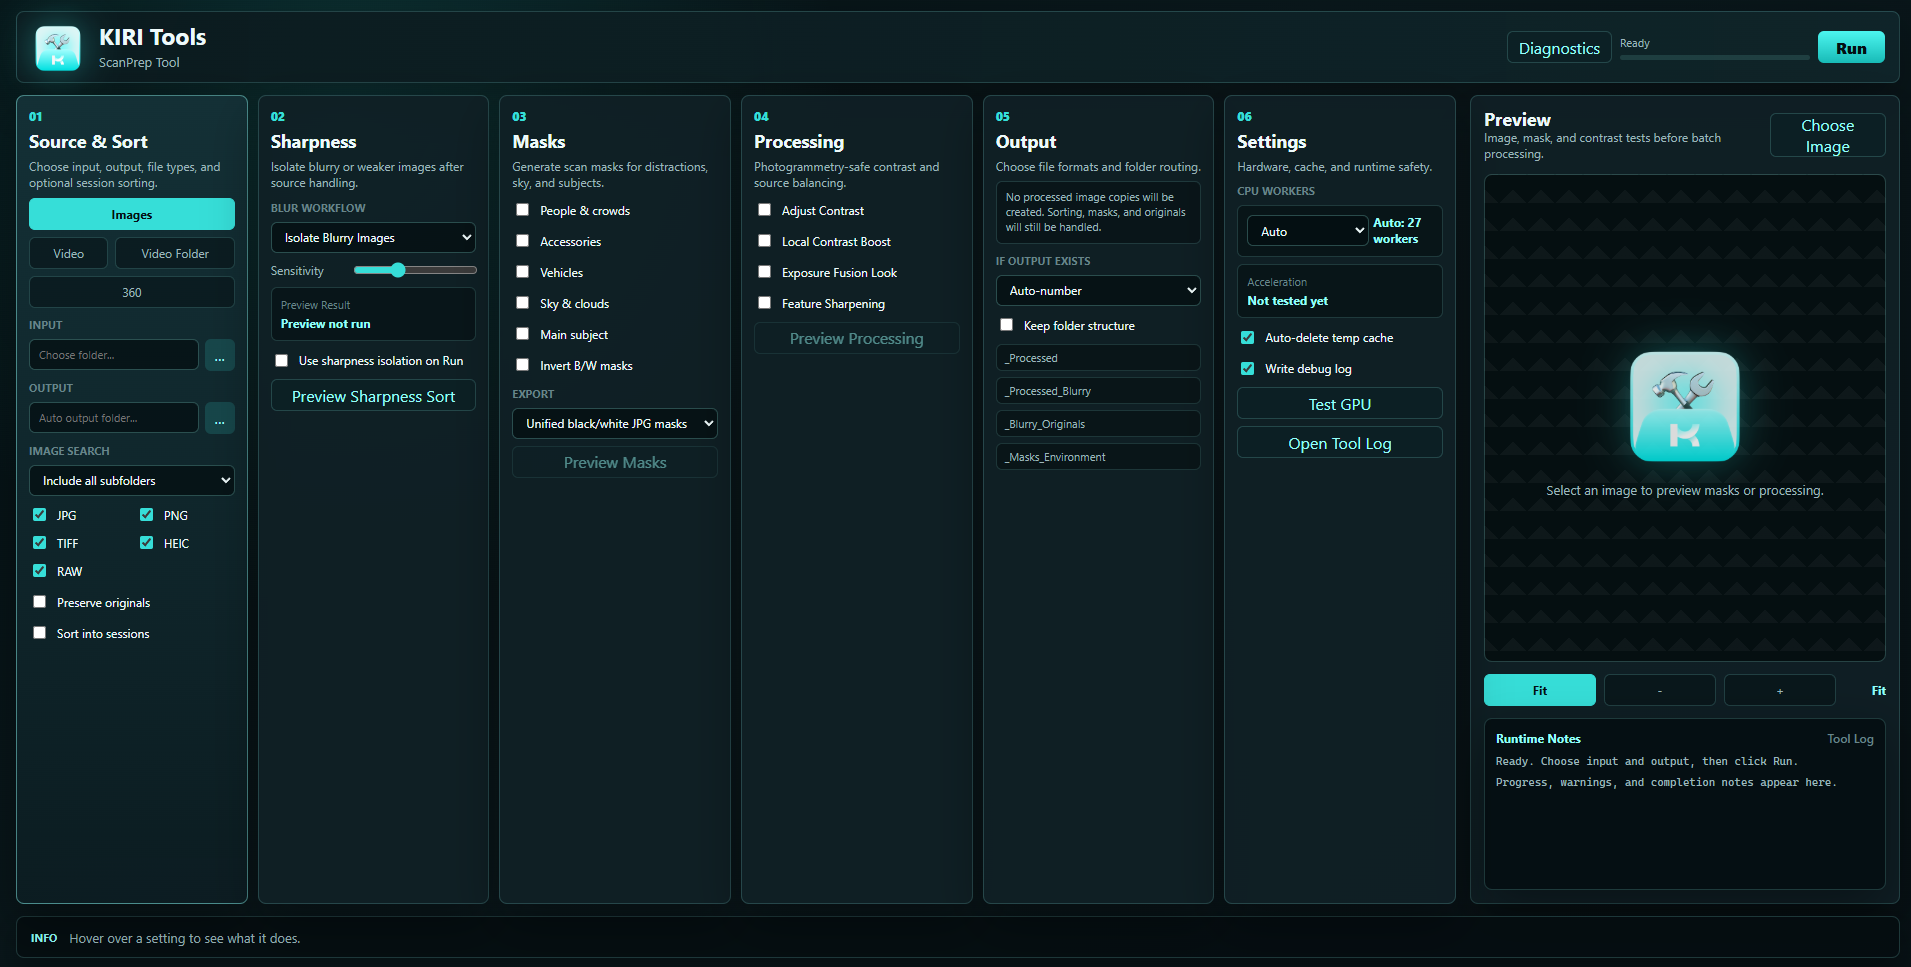
01 - Source & Sort
Use Source & Sort to choose the input type, input path, output path, file types, subfolder behavior, and optional session sorting.
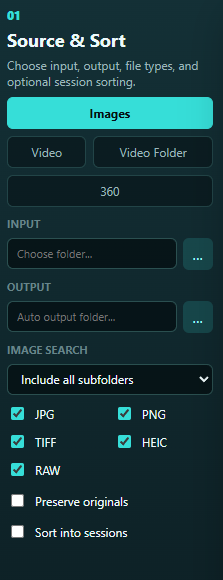
Source Mode
Images
Use Images for folders containing photos, RAW files, HEIC files, or other supported image types.
This mode is best for normal photo datasets from cameras, phones, drones, or image exports.
Video
Use Video for one normal video file. The app extracts frames first, then runs the selected sharpness, mask, and processing tools on those extracted frames.
Video Folder
Use Video Folder for a folder containing multiple videos.
360
Use 360 for equirectangular/360 video. The app extracts 360 frames, then unwraps each frame into perspective views that are more useful for photogrammetry.
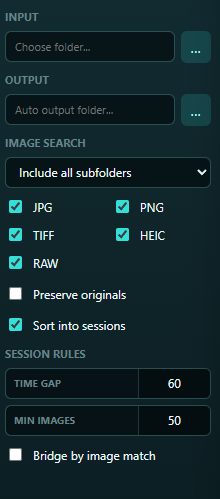
Input
Input is the source folder or video file the app will read.
When you choose an input, the output folder is automatically filled in as a _ScanPrep_Output folder near the input. You can change the output folder manually.
Output
Output is where the app writes generated files:
- Sorted sessions
- Isolated originals
- Extracted video frames
- 360 view images
- Masks
- Processed images
- Preview cache
- Debug logs
Image Search
Image Search controls how deep the app looks inside an image input folder.
Include all subfolders
Scans the selected folder and all folders below it.
Use this for messy or deeply nested image sets.
Top folder only
Only scans images directly inside the selected input folder.
Use this when you do not want images in subfolders included.
Include direct subfolders
Scans the selected folder and only one level of subfolders.
Use this when you have a simple folder layout but do not want deep recursion.
Subfolders are sessions
Treats each subfolder as its own session/source group.
Use this when your images are already organized into separate shoots, sources, scenes, or sessions.
Video Folder Search
Video Folder Search appears for Video Folder mode. It limits how deep the app searches for videos.
File Type Checkboxes
For Images mode, choose which image types to include:
- JPG
- PNG
- TIFF
- HEIC
- RAW
Turn off any file types you do not want processed. For example, if a folder contains both RAW and JPG versions, you can choose only one type.
Preserve Originals
Preserve originals changes cleanup behavior.
- Off: sorting and sharpness isolation can move originals into new folders.
- On: the app copies originals instead of moving them.
For large unorganized datasets, moving originals can be useful. For important source data, enable Preserve originals or work from a backup copy.
Sort Into Sessions
Sort into sessions splits an image set into scan sessions.
Use this when a folder contains multiple scans, multiple capture passes, or long unorganized sequences.
Time Gap
If the capture time gap between photos is larger than this number of seconds, the app starts a new session.
Example: if Time gap is 60, a gap longer than one minute starts a new session.
Min Images
Sessions smaller than this number are treated as small datasets.
Use this to keep tiny accidental groups separate from real scan sessions.
Bridge by Image Match
Bridge by image match uses image feature matching to keep visually connected photos together, even if capture times have gaps.
This can help when camera timestamps are imperfect, but it adds extra analysis time.
Video Frame Settings
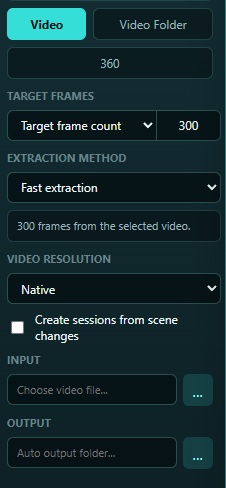
Video settings appear for Video, Video Folder, and 360 modes.
Target frame count
Extracts a target number of frames from the video.
For Video Folder mode, this is the target number of frames per video.
This is useful when you want a predictable output size.
Every Nth frame
Keeps one frame every N source frames.
Example: 10 means keep one frame, then skip the next nine source frames.
Extraction method
Extraction method appears when Target frame count is selected.
Fast extraction jumps to target timestamps. It is usually better for long or large videos.
Accurate extraction scans the video timeline more carefully. It can be slower, especially on large videos.
Video resolution
Choose whether extracted frames keep the original video resolution or are resized:
- Native
- 4K
- 1440p
- 1080p
Create Sessions From Scene Changes
This appears for Video and Video Folder modes.
When enabled, the app scans the video for strong scene changes and creates separate scene/session folders before extraction and processing.
Use this for edited videos, long YouTube videos, drone compilations, or mixed clips where different scenes should become separate sessions.
Scene detection scans the whole video before extraction, so long videos may take a while before frame extraction begins.
Scene Detection
Controls how sesnsitive to changes between frames the app is when determining a new scene:
Minimum Scene Length
Ignores scene cuts shorter than this many seconds.
Use this to prevent tiny flashes, transitions, or very short cuts from becoming their own folders.
360 Settings
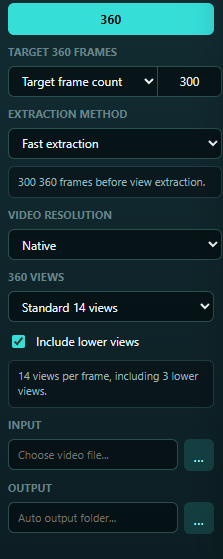
360 Views
Controls how many perspective views are created from each 360 frame.
Options:
- Standard 14 views
- Side-only 8 views
- Balanced 18 views
- Dense 26 views
More views give more coverage, but create more files and take longer.
Include Lower Views
Includes downward-looking 360 views.
Turn this off when the bottom of the video contains the photographer, tripod, selfie stick, floor artifacts, or unhelpful ground detail.
If Include lower views is off, the app skips lower 360 views where possible.
02 - Sharpness
Sharpness tools help isolate blurry or weaker images from a dataset.
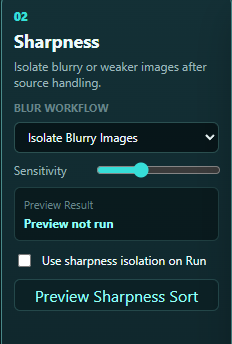
Blur Workflow
Isolate Blurry Images
Finds images likely to be blurry and isolates them for review.
Use this to clean a dataset while keeping most images.
Isolate Sharpest Images
Keeps the sharpest target count and isolates the rest.
Use this for huge datasets, extracted video frames, or near-duplicate image sets where you want to reduce the number of images.
If the input contains fewer images than the Keep count, all images are preserved.
Isolate Weakest in Cluster
Looks at nearby groups of images and isolates the weakest image in each group.
Use this for burst-like captures, video frames, or ordered scan walkarounds. It groups by sequence/order, not visual similarity.
Sensitivity
Used by Isolate Blurry Images.
Lower sensitivity isolates only more obvious blur. Higher sensitivity isolates more borderline images.
Keep Count
Used by Isolate Sharpest Images.
This is the number of sharpest images to preserve.
Cluster Size
Used by Isolate Weakest in Cluster.
This is the group size used when checking nearby images. For example, a cluster size of 5 checks groups of five ordered images and isolates the weakest from each group.
Preview Result
Shows the result of Preview Sharpness Sort, such as how many images would be preserved or isolated.
Use Sharpness Isolation On Run
Enable this when you want the selected sharpness workflow to be applied during the full Run.
If this is off, sharpness preview can still be used without applying sharpness isolation to the final batch.
Preview Sharpness Sort
Preview Sharpness Sort samples up to about 50 images and creates preview folders:
The preview folder opens automatically when complete.
Use this before running a real sort or isolation workflow. It lets you judge whether the current mode and settings are too aggressive or too gentle.
Preview Sharpness Sort should be treated as a guide, not a perfect decision maker.
03 - Masks
Masks create black/white or transparent files that can help reconstruction software ignore distractions.

People & Crowds
Masks detected people and crowds.
Use this for public places, events, tourist footage, or crowd-sourced datasets where people should not influence reconstruction.
Accessories
Masks detected movable objects such as bags, chairs, or similar distractions where the model can identify them.
Use this when the scene contains temporary objects that are not part of the scan subject.
Vehicles
Masks cars, bikes, buses, and related vehicle classes.
Use this for streets, outdoor landmarks, and public spaces.
Sky & Clouds
Masks sky and clouds.
Use this for outdoor scans where sky content does not help reconstruction or can create unwanted background geometry.
Main Subject
Creates a subject-focused mask.
Use this when the main scan subject should be separated from surrounding clutter.
Mask 360 Bottom Area
Appears only in 360 mode when lower views are included.
Masks the bottom/nadir area where tripod, selfie stick, floor, or camera operator artifacts often appear.
Invert B/W Masks
Swaps black and white in saved black/white masks.
Normally, white means keep/use and black means mask/exclude. Some downstream tools expect the opposite convention. Use Invert B/W masks only when your target software needs it.
Export
Unified black/white JPG masks
Combines enabled environment masks into fewer black/white JPG mask outputs.
Separate black/white JPG masks
Writes separate mask files by category, such as people/objects, sky, subject, or 360 bottom where available.
Use this when you want to inspect or use different mask types separately.
Transparent PNGs
Creates transparent PNG outputs using the mask as alpha.
Preview Masks
Preview Masks lets you choose or generate a preview image and see masks before running a full batch.
If multiple mask types are enabled, the preview shows selectable mask views/tabs. For example:
The first mask preview may be slow because AI models need to load. Later previews are usually faster.
04 - Processing
Processing tools are scan-focused image adjustments. They are not intended to make images prettier for sharing; they are intended to make scan inputs more usable.
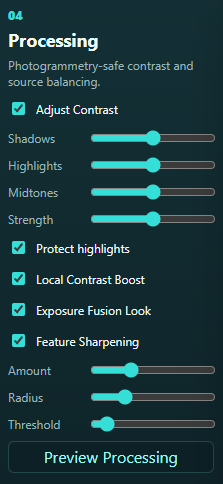
Adjust Contrast
Enables scan-focused tone controls.
Use Preview Processing before running a large batch.
Shadows
Raises or lowers dark image detail.
Increasing shadows can reveal more texture in dark areas. Too much can lift noise.
Highlights
Raises or lowers bright areas.
Lowering highlights can help recover bright detail. Too much can make images look flat or unnatural.
Midtones
Adjusts middle brightness values without only targeting shadows or highlights.
Use this for overall tonal balance.
Strength
Controls how strongly the contrast adjustment is applied.
Lower values are safer. Higher values are more aggressive.
Protect Highlights
Reduces the chance of bright details being pushed too far while adjusting contrast.
Usually keep this on.
Local Contrast Boost
Experimental luminance-only local contrast enhancement.
This can sometimes help photogrammetry by making real local detail more visible.
Consider this feature experimental and test data sets with this on and off.
Exposure Fusion Look
Experimental single-image exposure-fusion style processing.
This can sometimes make detail more visible, but may create unnatural local contrast on some images.
Use preview before applying it to a full dataset.
Feature Sharpening
Applies controlled sharpening to make real image features easier to detect.
Use carefully. Over-sharpening can create halos or emphasize noise.
Amount
Controls sharpening strength.
Higher values create stronger edge enhancement.
Radius
Controls the size of features affected by sharpening.
Lower values sharpen fine detail. Higher values affect broader edges.
Threshold
Avoids sharpening tiny noise or weak texture.
Higher values sharpen only stronger edges.
Preview Processing
Preview Processing shows an A/B comparison of original versus processed output.
It is only available when at least one processing feature is enabled.
For RAW files, the app may first create a temporary display JPG. For video or 360 inputs, it may first grab a preview frame.
05 - Output
Output controls generated image formats, overwrite behavior, and folder routing.
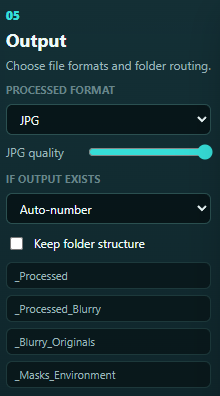
Processed Format / Generated Format
If processing features are enabled, this controls the processed image format:
- JPG
- PNG
- TIFF
If no image processing is enabled but the source mode generates images, such as Video or 360, the label may describe generated format instead.
If no processed image copies are needed, the app shows:
JPG Quality
Controls JPG output quality when JPG is selected.
Higher values preserve more image detail but create larger files. Lower values create smaller files but may add compression artifacts.
If Output Exists
Controls what happens when the app tries to write a file and a file with that name already exists.
This applies to generated processed images, masks, video frames, 360 views, and other output files.
Auto-number
Creates a new numbered filename instead of replacing the existing file.
Skip existing
Leaves the existing file untouched and skips writing the new one.
Overwrite
Replaces the existing output file.
Keep Folder Structure
Keeps source subfolder layout where possible in generated output.
Use this when source folders already have meaningful organization.
Common Output Folders
The app may create folders such as:
Exact folders depend on enabled features.
Processed images from isolated blurry/weak images are routed separately where possible, such as _Processed_Blurry .
06 - Settings
Settings control workers, cache behavior, logs, diagnostics, and hardware checks.
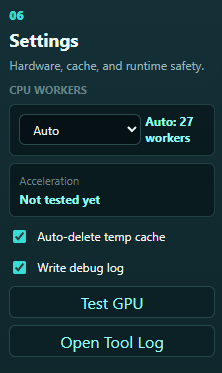
CPU Workers
Controls how many CPU workers the app asks the backend to use.
Auto uses the computer CPU count and usually leaves one thread free. AI/GPU jobs may cap workers internally to avoid overloading the system.
If the computer becomes sluggish during runs, choose fewer workers.
Acceleration
Shows the current acceleration state after testing or running.
If GPU acceleration is unavailable or unsupported, the app should fall back to CPU.
Auto-delete Temp Cache
Enabled by default.
When enabled, the app removes temporary extraction and preview cache files where safe after runs/previews.
Turn this off only if you need to inspect temporary files for troubleshooting.
Write Debug Log
Writes a debug timing log into the output folder.
Use this when testing, reporting bugs, or diagnosing slow/failed runs.
Test GPU
Checks whether this computer can use GPU acceleration.
If the GPU test fails, the app should use CPU fallback for AI tasks.
Run this if you are unsure whether AI masking will use GPU or CPU.
Open Tool Log
Opens detailed runtime notes and logs for troubleshooting.
Use this if a process fails, seems slow, or produces unexpected output.
Diagnostics
The Diagnostics button at the top of the app opens a panel with:
- App/tool status
- Python/backend information
- AI model status
- GPU/CPU acceleration information
- Output folder/log status
- Recent runtime notes
Run, Stop, and Completion
Click Run to start the current batch.
While running:
- The Run button changes to Stop.
- Most settings are locked.
- Runtime Notes show progress.
- The progress bar updates when the backend reports progress.
Click Stop to cancel a long run. Stopping is best-effort: partial outputs may already exist, and temporary work may need cleanup.
When the run completes, Runtime Notes should show a completion message with counts for handled source items, masks, processed images, and routed originals.
Preview Best Practices
Use previews before running large batches.
Recommended preview order:
- Choose or generate a source preview.
- Preview Sharpness Sort if sharpness isolation will be used.
- Preview Masks if masks will be generated.
- Preview Processing if contrast, local contrast, exposure fusion, or sharpening will be used.
- Adjust settings.
- Run a small test folder.
- Run the full dataset.
RAW Preview Tips
RAW files are not displayed directly by Electron. The app creates a temporary display JPG for preview.
This does not mean the original RAW file was converted or overwritten. It is only for display.
RAW preview can take longer than JPG preview.
Video Preview Tips
For video and 360 sources, use Preview Position to choose the best preview frame.
The default middle frame may not show the best lighting, maskable regions or subject view.
FAQ and Gotchas
Why is the Windows installer split into an EXE and BIN files?
The Windows build includes Electron, the Python backend, AI models, and CUDA/PyTorch GPU support. That makes the full installer large, so the installer is split into parts.
Download all parts into the same folder, then run only:
Why is the first mask preview or first mask run slow?
AI models need to load the first time they are used. On some systems this can take a while.
After models are loaded, later previews/runs are usually faster.
What happens if my GPU is unsupported?
The app should fall back to CPU.
CPU is slower, especially for AI masking, but should keep the workflow usable.
Older NVIDIA GTX cards, AMD GPUs, Intel GPUs, and unsupported NVIDIA driver setups may use CPU fallback.
Why does video extraction take a long time?
Video extraction can be slow when:
- The source video is long.
- The video is high resolution.
- Accurate extraction is selected.
- Scene detection is enabled.
- 360 view extraction is enabled.
Use Fast extraction for long videos when exact frame distribution is less important.
Why does scene detection pause before extraction?
Scene detection must scan the whole video first to find scene changes. On long videos, this can look like a pause before frame extraction starts.
Check Runtime Notes for progress.