
Scatter by KIRI Engine v1.0.0
Stop fighting with particle systems and chaotic node trees. Scatter is a streamlined toolkit designed to bridge the gap between your asset library and creating 3D environments. Whether you need precise manual placement, procedural scattering, or dropping physics-based clusters of objects, 3 distinct scatter modes take care of it all.

Download Scatter Addon

Please note: We are making these Blender addons available to you completely for free.:) If you like what we are doing, the best way to support us is to download KIRI Engine app on your phone and consider becoming a KIRI Engine Pro user
1. Important Notes and Tips
The most common reason for KIRI Asset Packs assets not appearing in the addon is a folder structure mismatch. The add-on is programmed to look for this exact pattern:
Folder Name > Quality Folder > FileWithSameName.blend
Correct: .../Rocks/High/High.blend
Incorrect: .../Rocks/High/Rock_01.blend (The file name must match the quality folder).
For extra help check the Readme.txt included with KIRI Asset Packs, and make sure any Asset Pack released before the addons release (Feb 2026) is re-downloaded.
Apply Scale: Before using any scatter mode, check your input object/target surfaces scales. If scale is not applied, scattering and physics may be unpredictable. Scales can be applied withCtrl + A > Scale.
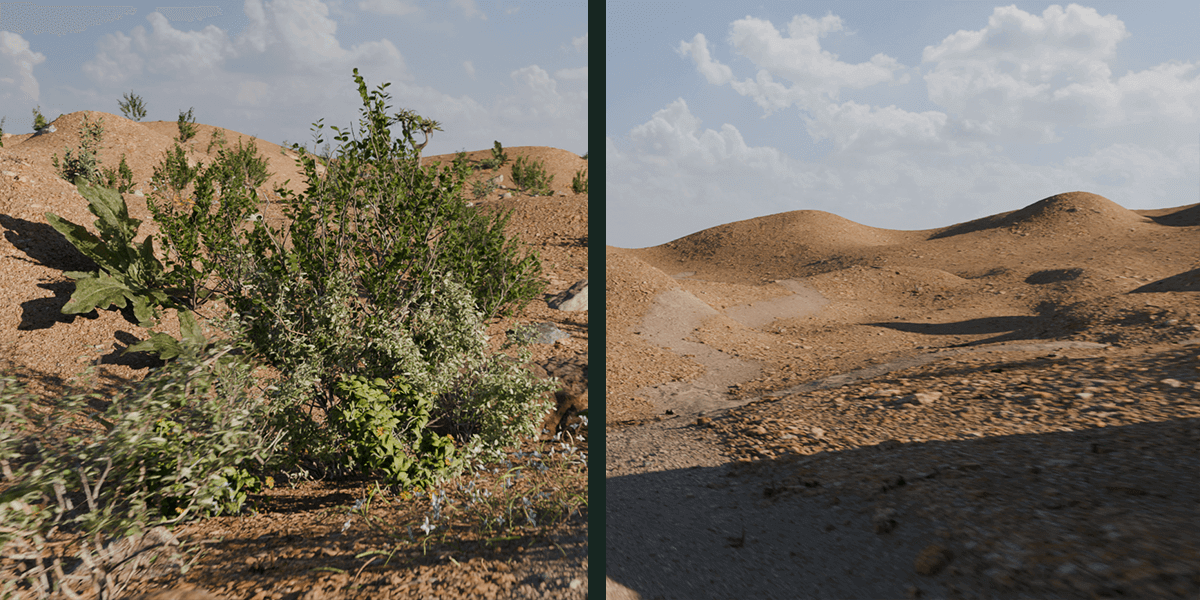
All objects and scenes used in the creation of the example images were taken from the amazing resource that is Polyhaven.com However the addon is designed to work with any 3D objects you choose.
2. Installation
The add-on was made with Blender 5.0.1 Full cmpatibility with lower versions cannot be guaranteed.
To install the addon make sure you have downloaded the addon .ZIP file to your computer.
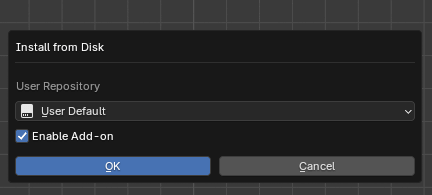
Drag and drop the .ZIP from a file browser into Blender’s 3D viewport.
A confirmation window will appear. Hit okay and the addon will be installed
The add-on should now be visible on the N-Panel of the 3D Viewport
3. Important Notes - Mesh Preparation
Correct origin placement of your input objects depends entirely on your chosen scatter mode.
For Click & Simple Scatter:
Placement: Set Origin to Base (bottom center).
Reason: These modes place the object's origin directly onto the target face. If the origin is centered, the object will spawn half-buried.
For Physics Scatter:
Placement: Set Origin to Geometry (Center of Mass).
Reason: The Rigid Body engine calculates mass and rotation around the origin. A bottom-heavy origin causes unstable rolling and unnatural behavior during the drop.
Apply Scale ( Ctrl + A ):
Physics: Unapplied scale sometimes results in incorrect mass calculations (heavy objects acting like feathers).
Simple Scatter: Unapplied scale on the Target Surface can cause density issues.
Apply Rotation:
Ensure your source objects are oriented Z-Up in global space before scattering.
Apply Rotation (Ctrl + A) so the delta is (0,0,0). Objects with unapplied rotation will snap to weird angles when "Align to Normal" is used.
4. Input Collection
Before you can scatter anything, KIRI Scatter needs to know what objects to use as the scatter input. It relies on an outliner collection (KIRI_Scatter_Collection) as its source.
You must explicitly Link objects into this system using the Input tab.
Selected objects, or KIRI Asset Pack objects, can quickly be linked with the Link buttons, and the objects will still remain linked to their original outliner Collections.
5. Input - Selected
Use this method to scatter objects that are already in your scene.
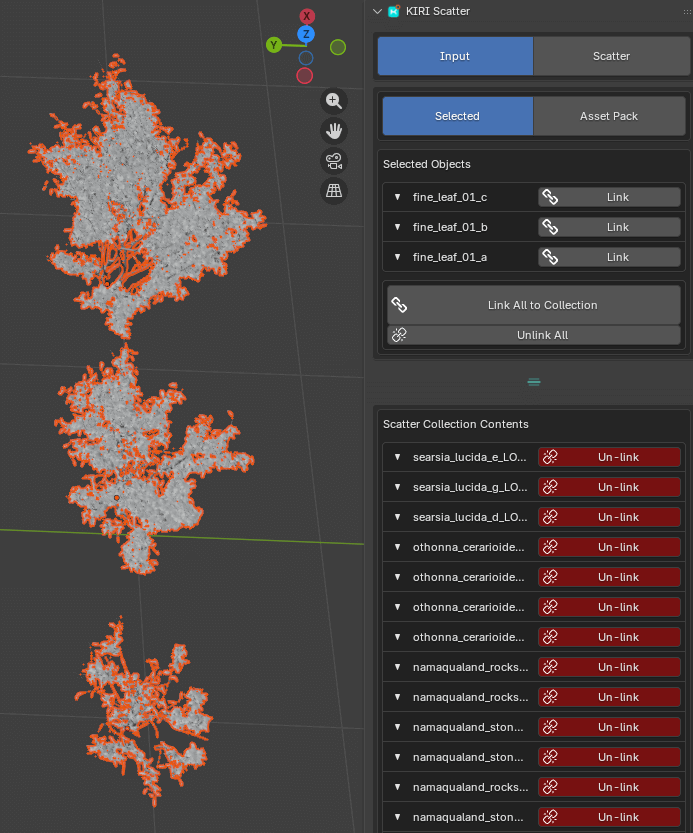
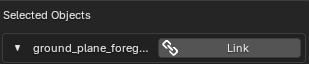
Highlight the objects you want to scatter in the 3D Viewport.
In the KIRI Input panel, check the Selected Objects list. You will see a "Link" icon next to any object that isn't yet registered.
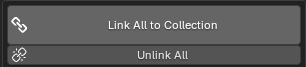
Click Link All to Collection to link them all at once.
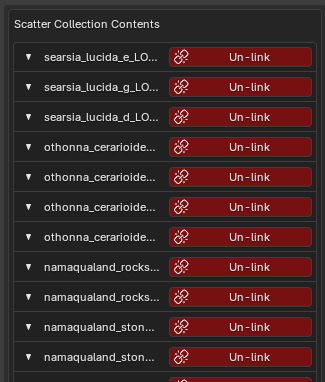
The bottom box (Scatter Collection Contents) will update to show your active scatter sources. These are the objects that will be used by the Click, Physics, and Simple scatter engines.
6. Input - Asset Pack
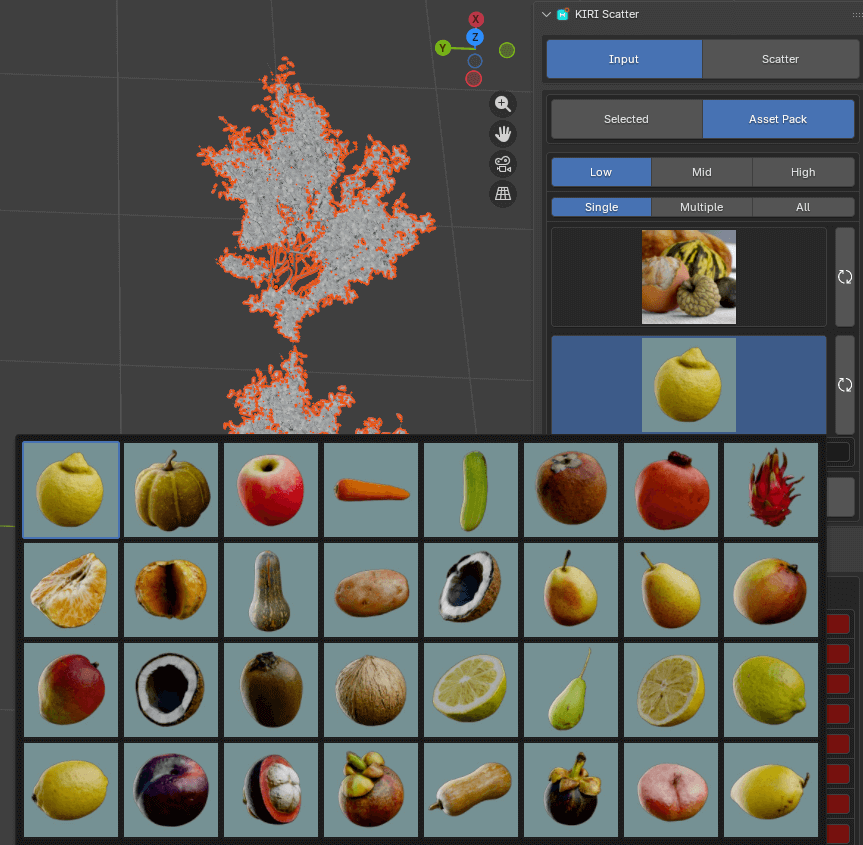
Use this method to import and auto-link assets from an external KIRI Asset Pack library.
Configure: Ensure your Asset Pack Root Directory is set in Preferences.

The addon is programmed to look for this exact pattern:
Folder Name > Quality Folder > FileWithSameName.blend
Correct: .../Rocks/High/High.blend
Incorrect: .../Rocks/High/Rock_01.blend (The file name must match the quality folder).
For more help read the Readme.txt files included with KIRI Asset packs.
If you downloaded the Asset Pack before the Scatter addon was released, you may have an incorrect file structure after downloading
Browse:
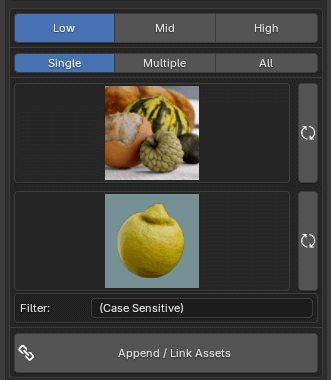
Quality: Toggle between High, Mid, or Low will set which type of Asset is imported - providing the Assets are found. In most cases, High is best avoided for scattering.
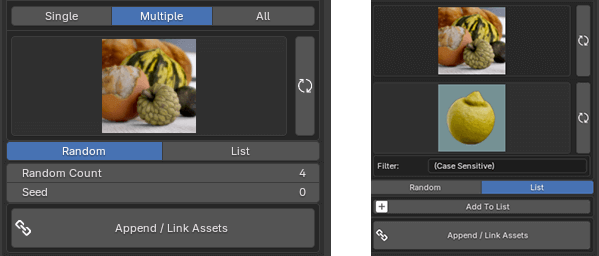
Import Amount: Select whether you want to import Single, Multiple or All (not recommended) Assets from a collection
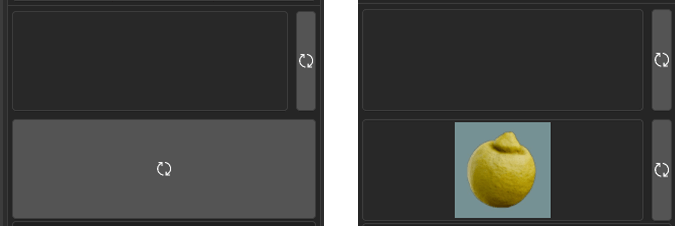
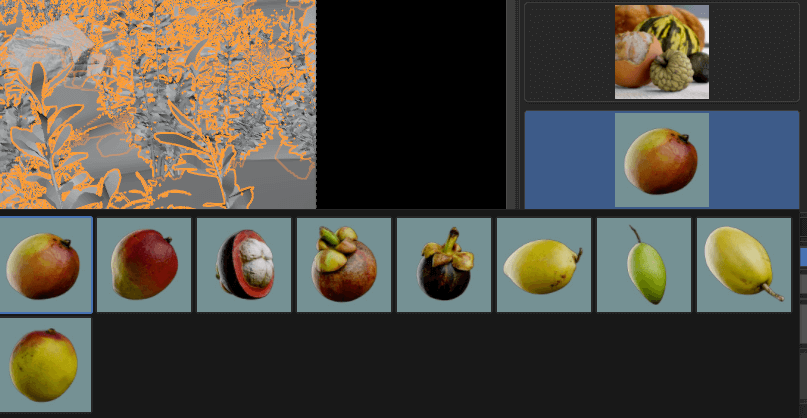
Gallery: Select a Category (folder) and click a thumbnail to choose an asset.
Selecting Multiple will allow you to import a random sample of objects from the Asset Pack, or create a list of objects to import.
If Asset Icons are blank, check file paths and try to refresh the Icons with the refresh buttons. For large Assets Packs this may be slow
The Filter will refresh the show only Icons of Assets that have the filter in their name

Import: Click Append
Auto-Linking: The addon automatically imports the object and links it to the KIRI_Scatter_Collection in one step, so it is immediately ready for scattering.
7. Scatter Types

Once you have populated the Scatter Collection in the Input tab, you are ready to start placing objects.
1. Click Scatter (Manual Placement)
The "Point and Shoot" mode. This is best for placing specific "Hero" assets where you need total control over composition.
Best for: Placing a specific tree in the foreground, adding detail to a specific corner, or manually dressing a set.
Key Feature: Automatically aligns objects to the surface normal and randomizes them instantly upon clicking.
2. Simple Scatter (Procedural / Geometry Nodes)
The "Fill" mode. This applies a non-destructive Geometry Nodes modifier to a target mesh or curve. It is fast, efficient, and editable.
Best for: Large-scale environmental coverage, such as grass on a hill, debris on a floor, or scattering along a path.
Key Feature: Uses Poisson Disk distribution to ensure objects never overlap, keeping your scene clean and realistic.
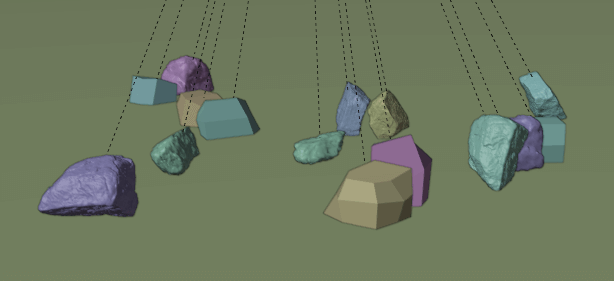
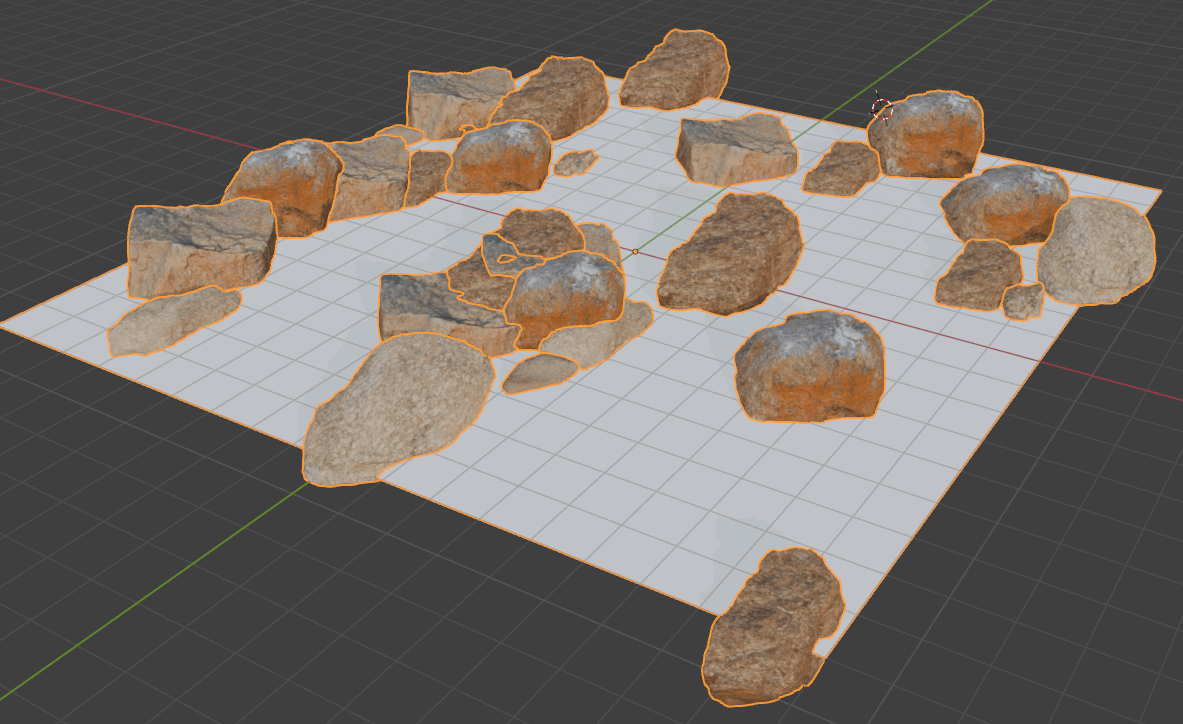
3. Physics Scatter (Simulation)
The "Natural" mode. This uses Blender’s Rigid Body physics engine to drop objects into the scene, letting gravity and collision determine their final resting place.
Best for: Piles of rocks, messy desks, filling containers, or any scenario where objects need to stack and interact naturally.
Key Feature: Interactive controls allow you to use Wind, Vortex fields, and Gravity toggles in real-time to "direct" the falling objects.
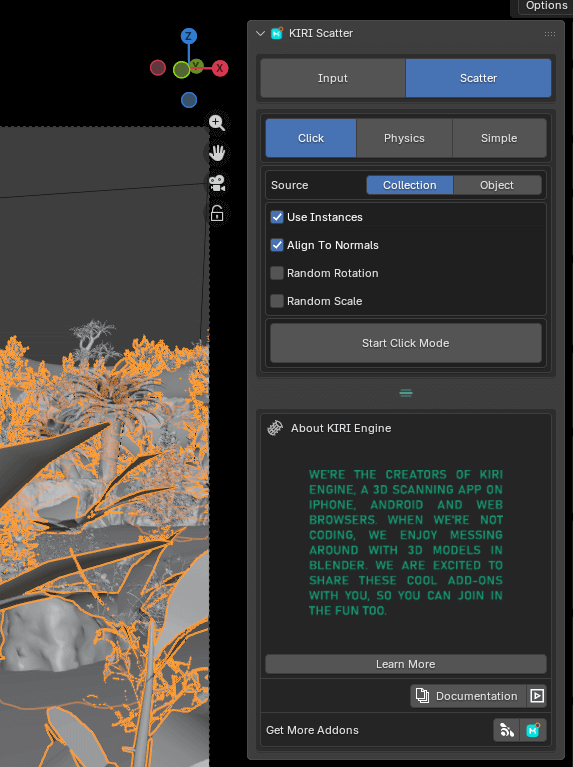
8. Scatter - Click
Click Scatter is a "Point and Shoot" tool designed for precise, artistic control. Unlike the other modes which flood an area, this mode allows you to manually paint specific objects exactly where you want them (e.g., placing a specific hero tree in the foreground).
1. Configuration Settings
Before starting the tool, configure how your objects will behave when spawned.
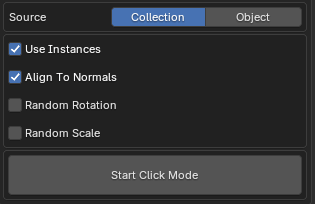
Source Type:
Collection: Randomly picks a different object from your active Scatter Collection every time you click. Perfect for variety.
Object: Repeatedly spawns one specific object. Useful if you need to place the exact same mesh multiple times.
Use Instances (Important):
Enabled (Recommended): Spawns lightweight "Instance" objects. These use virtually no memory but cannot be sculpted or edited individually.
Disabled: Spawns real, unique duplicates. Use this only if you plan to manually edit the vertices of the scattered objects later.
Placement Settings
Align to Normals:
On: The object rotates to match the angle of the surface (e.g., a snail crawling up a wall).
Off: The object remains perfectly upright (Z-up), regardless of the slope (e.g., a tree growing on a steep hill).
Randomization
Random Rotation: Randomly rotates the object 360° around its local Z-axis.
2. How to Use
Select Target: In the settings, choose whether you are scattering from your Collection or a single Object.
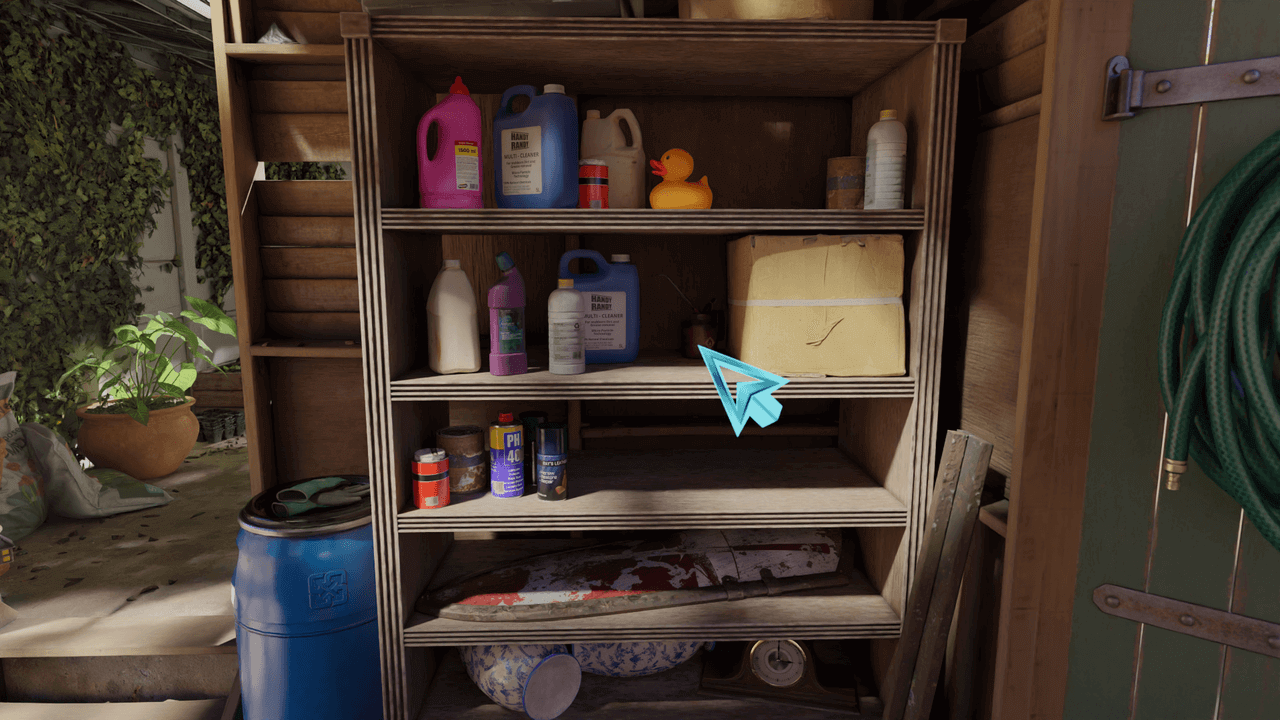
Activate: Click the Start Click Mode button. The mouse cursor will change to a crosshair.
Spawn: Left Click anywhere on your scene geometry. The tool will raycast from your camera and place an object exactly where you click.
Finish: Press Right Click or Esc to exit the tool.
3. Workflow Tips
Instances & Performance: If you are placing hundreds of high-quality assets (like KIRI scans), always keep Use Instances checked. Using real geometry for hundreds of scans will crash Blender.
Undo: If you misplace a click, you must exit the tool (Esc) and use Ctrl + Z. You cannot undo individual clicks while the tool is active.
9. Scatter - Physics
Physics Scatter leverages Blender’s native Rigid Body system to create natural, chaotic arrangements. Instead of placing objects mathematically, you "drop" them into the scene and let gravity, collisions, and force fields determine their final resting place.
This mode is ideal for:
Piles of debris, trash, or rocks.
Filling containers (e.g., fruit in a bowl).
Scattering items that need to stack realistically (e.g., coins or books).
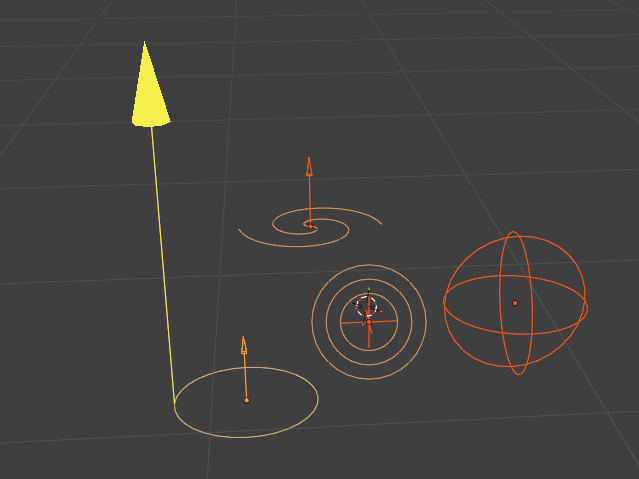
Helper Objects
Physics mode requires specific "Helper" objects to tell the simulation where to spawn items and how to move them. They are simple Blender 'Empties' that can either spawn new objects (Spawner), or exert force on objects already in the Scene (all other Helpers)
From the Helper Objects sub menu we can create, remove or manager existing helpers.
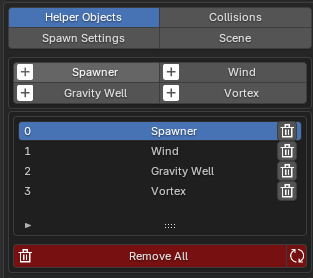
The top of the Physics panel displays the Helper Manager.
+ buttons will add helpers of that type to the scene.
Remove Helper: Deletes the currently selected helper.
Clear All: Removes every KIRI helper object from the scene (useful for resetting).
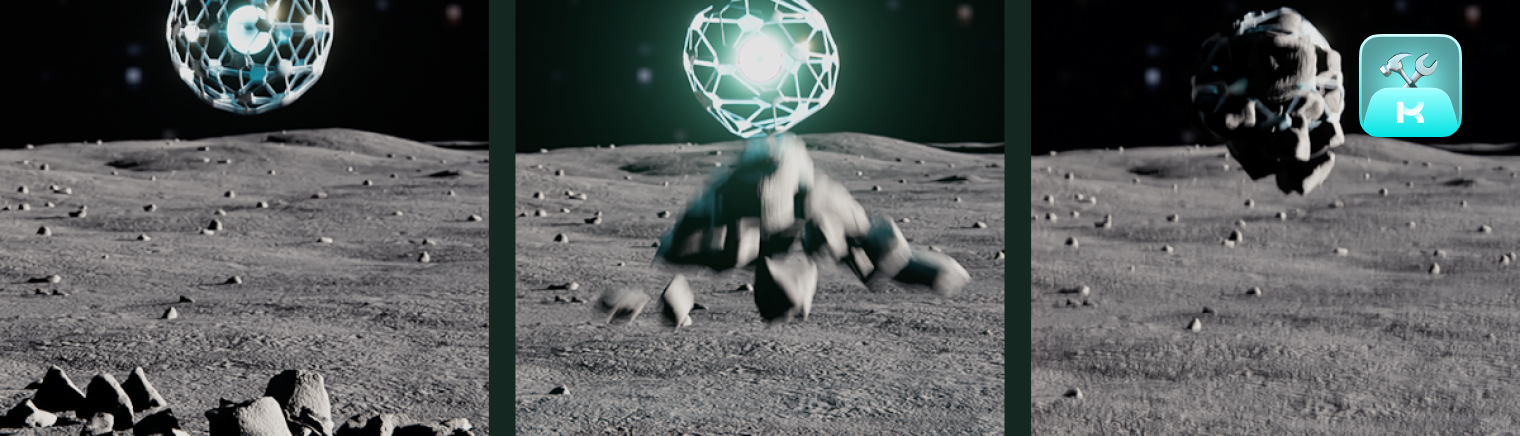
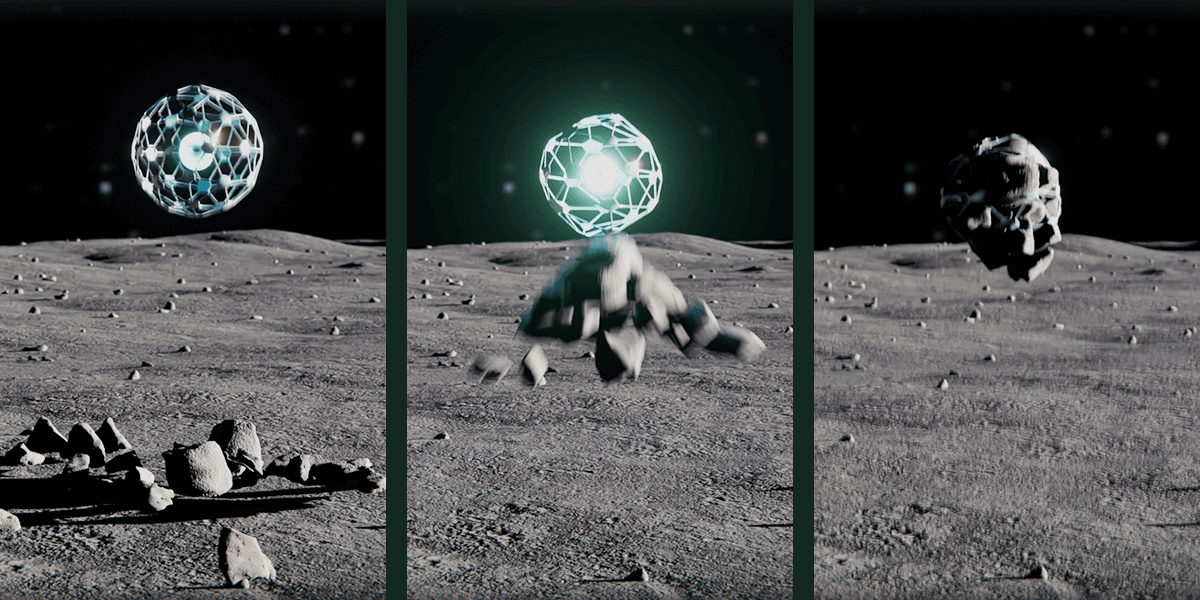
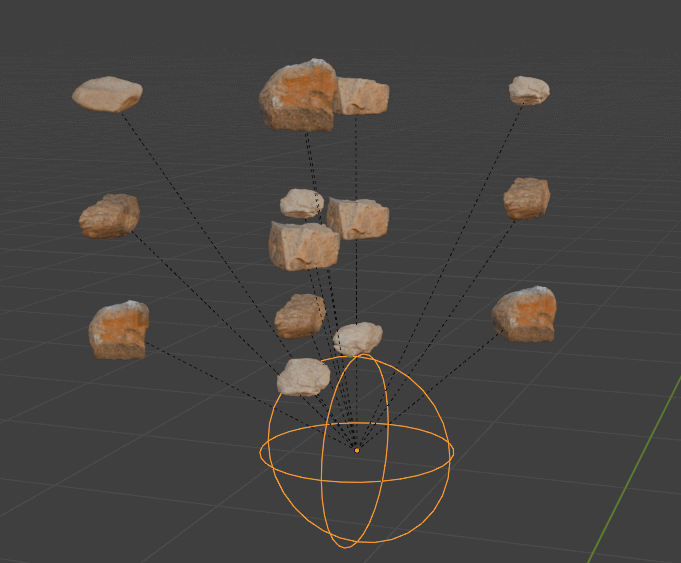
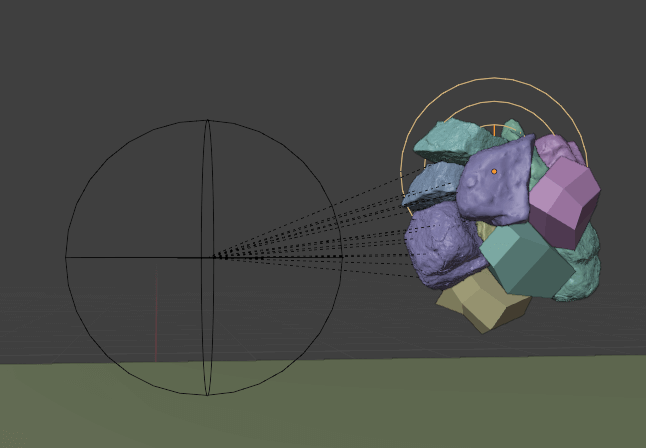
Add Spawner (Required):
Creates a wireframe sphere in the viewport.
Function: This is the "emitter." Objects will appear at this location and fall downwards. Move this object above your target ground or collision surface.
Add Gravity Well:
Creates a force field that pulls objects toward it (like a magnet).
Use Case: Pulling scattered rocks into a specific pile or corner.
Add Wind:
Creates a directional force.
Use Case: Blowing leaves against a wall or pushing debris in a specific direction.
Add Vortex:
Creates a spinning force.
Use Case: Creating swirling patterns or "tornado" style scattering.
The polarity and strength of all forces can be quickly adjusted
Spawn Settings
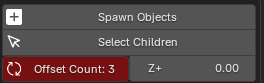
Selecting a Spawner and pressing Spawn Objects will create new objects - with the current Spawner Settings - at the Spawners location.

To avoid intersections and physics explosiosn, succesively clicking Spawn Objects will add an offset to the Z location of the spawned objects.
This offset can be reset by pressing the Active Spawner Object's Offset Count. The offset can be increased with the Z+ value.
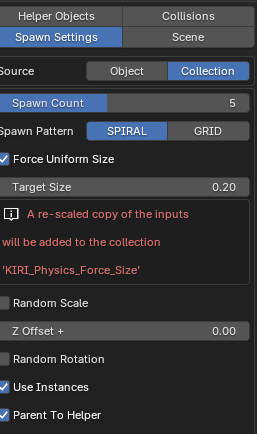
Source Settings
Source: Choose whether to drop random items from your Collection or repeat a single Object.
Spawn Count: The "Batch Size." This determines how many objects appear each time you click the spawn trigger.
Warning: Setting this too high (e.g., 50+) can cause lag if the objects are high-poly.
Placement & Size
Spawn Pattern:
Spiral: Spawns objects in a circular pattern expanding outward.
Grid: Spawns objects in a square array.
Z Offset: Adds extra vertical distance between objects in a single batch so they don't spawn inside each other.
Force Uniform Size:
Enable this to force every spawned object to resize to the Target Size (e.g., 0.5m). This will create a scaled copy of the objects, stored in a new collection ''KIRI_Physics_Force_Size''
Physics Properties
Collision Shape: Defines the invisible "hitbox" used by the physics engine.
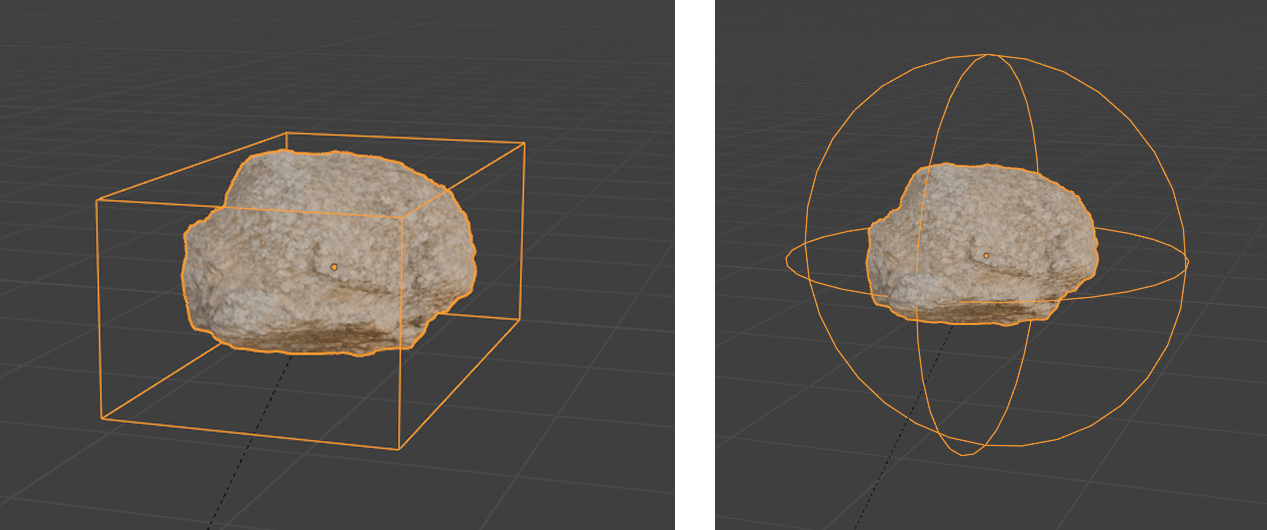
Convex Hull (Recommended): Creates a shrink-wrap shape around the object. Fast and accurate enough for 95% of cases.
Box: Fastest, but inaccurate for round objects.
Sphere: Good for rocks/balls, bad for flat items. This is set as the default due to its performance speed.
Mesh: Perfect accuracy (allows objects to fall inside things like cups), but very slow (CPU heavy).
Parent To Helper
Whether the spawned objects are parented to the Spawn Helper object
If objects are parented, their location will 'reset' to the Helper Objects current location each time the timeline resets.
If they are not parented, spawned objects will return to the position they were originally spawned at when the timeline resets.
Collisions
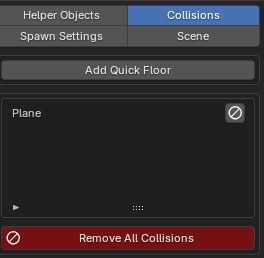
Objects will fall endlessly if they don't hit anything. You must tell KIRI Scatter what constitutes "solid ground."
Add Quick Floor: Instantly creates a large, invisible plane beneath your scene to catch falling objects.
Add Collision to Active:
Select an object in your viewport (e.g., a table, a terrain, or a bowl).
Click this button to give it "Passive" physics properties. Scattered objects will collide with it.
Remove All Collisions: Cleans the scene by removing collision physics properties from all objects (does not delete the objects themselves).
Forces
While the Spawner determines where objects appear, Force Helpers determine how they move. These invisible fields allow you to sculpt the simulation, pushing and pulling falling objects into specific arrangements rather than just letting them pile up randomly.
Types of Forces:
Gravity Well:
Function: Acts as a spherical magnet.
Polarity: Negative strength Pulls objects into a pile. Positive strength Repels objects, blasting them away from the center (perfect for explosions or clearing a space).
Wind:
Function: A directional force that continuously pushes objects along the arrow's path.
Use Case: Blowing leaves against a fence, leaning grass over, or casting debris across a floor.
Vortex:
Function: A spinning force field.
Use Case: Creates swirling, tornado-like patterns. Great for chaotic piles or artistic, circular scattering.
Interactive Simulation
This is where the magic happens. Unlike standard Blender physics where you press "Play" and wait, KIRI Scatter lets you "Direct" the scene in real-time.
To start the engine Click Start Interactive Physics.
The timeline will begin playing automatically.
A warning will appear at the top of the screen that Ctrl+ Shift + H will show tips for the currently selected Helper Object (if you have one selected)
Press Escape / Right Click to exit this mode
Live Controls (Hotkeys) Use these keys while the simulation is running to interact with the scene:
Ctrl + Left Click (Spawn or Toggle Forces):
Drops a batch of objects from the active Spawner. Hold Ctrl and keep clicking to pile them up.
Toggles force strength on/off for force Helper Objects
Ctrl + Down Arrow (Gravity Toggle):
Turns global gravity ON or OFF.
Ctrl + Scroll Wheel (Force Strength):
If you have a force Helper Object selected, scrolling up/down increases or decreases its power.
Right Click or Esc:
Stops the simulation and exits Interactive Mode.
Finalizing
Once you stop the simulation, the objects are technically still "Rigid Bodies." If you press Play on the timeline, they will fall again. You must "Finalize" them to make them standard objects.
Apply Transforms (Recommended):
"Freezes" the objects in their current resting position.
Removes all physics properties (Rigid Body settings).
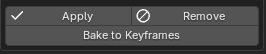
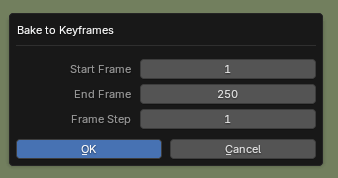
Bake to Keyframes:
Turn the currently cached physics simulation into keyframes for a selected object
10. Scatter - Simple
Simple Scatter is the typical procedural scattering option. Unlike Click Mode (which places static objects) or Physics Mode (which simulates gravity), this mode applies a Geometry Nodes modifier to your target object.
This means the scattering is Non-Destructive. You can change the density, swap assets, or adjust the seed at any time without having to "undo" or delete meshes.
Simple Scatter - Add
Input: Ensure your Scatter Collection is populated (via the Input tab).
Target: Select the object you want to scatter onto (a landscape mesh or a curve path).
From the Simple submenu, and Add panel click Add to Active Object.
Note: The panel will automatically detect if you selected a Mesh or a Curve and will append the appropriate settings
Common Simple Scatter Settings
These settings are shared amongst the Simple Scatter modes
Alignment
Align Rotation:
Whether to align the objects rotation to the surface normals / curve direction
Axis (X/Y/Z): Which axis of your scattered object should point "Up"?
Randomization
Local vs Global Space:
Local: Randomizes based on the object's own orientation (e.g., scaling it makes it taller along its own trunk).
Global: Randomizes based on the world axes (e.g., "shear" effects).
Random Offset: Shifts the object away from its spawn point.
Random Rotation: Adds variation to the rotation.
Random Scale: Adds size variation.
Seed
Seed: The "Shuffle" button. If you don't like the random layout, change this number to get a completely new variation using the same settings.
Scatter on Surface
Best for: Natural environments, grass, debris, rocks, forests.
This mode distributes objects across the general surface of your mesh. It ignores the specific topology (wireframe) and focuses on covering the area.
Distribution Type:
Poisson Disk (Recommended): The "Anti-Collision" mode. It enforces a minimum Distance between every object. Use this to prevent trees or rocks from clipping into each other.
Random: Pure chaos. Objects are placed completely randomly. This is faster but allows overlapping.
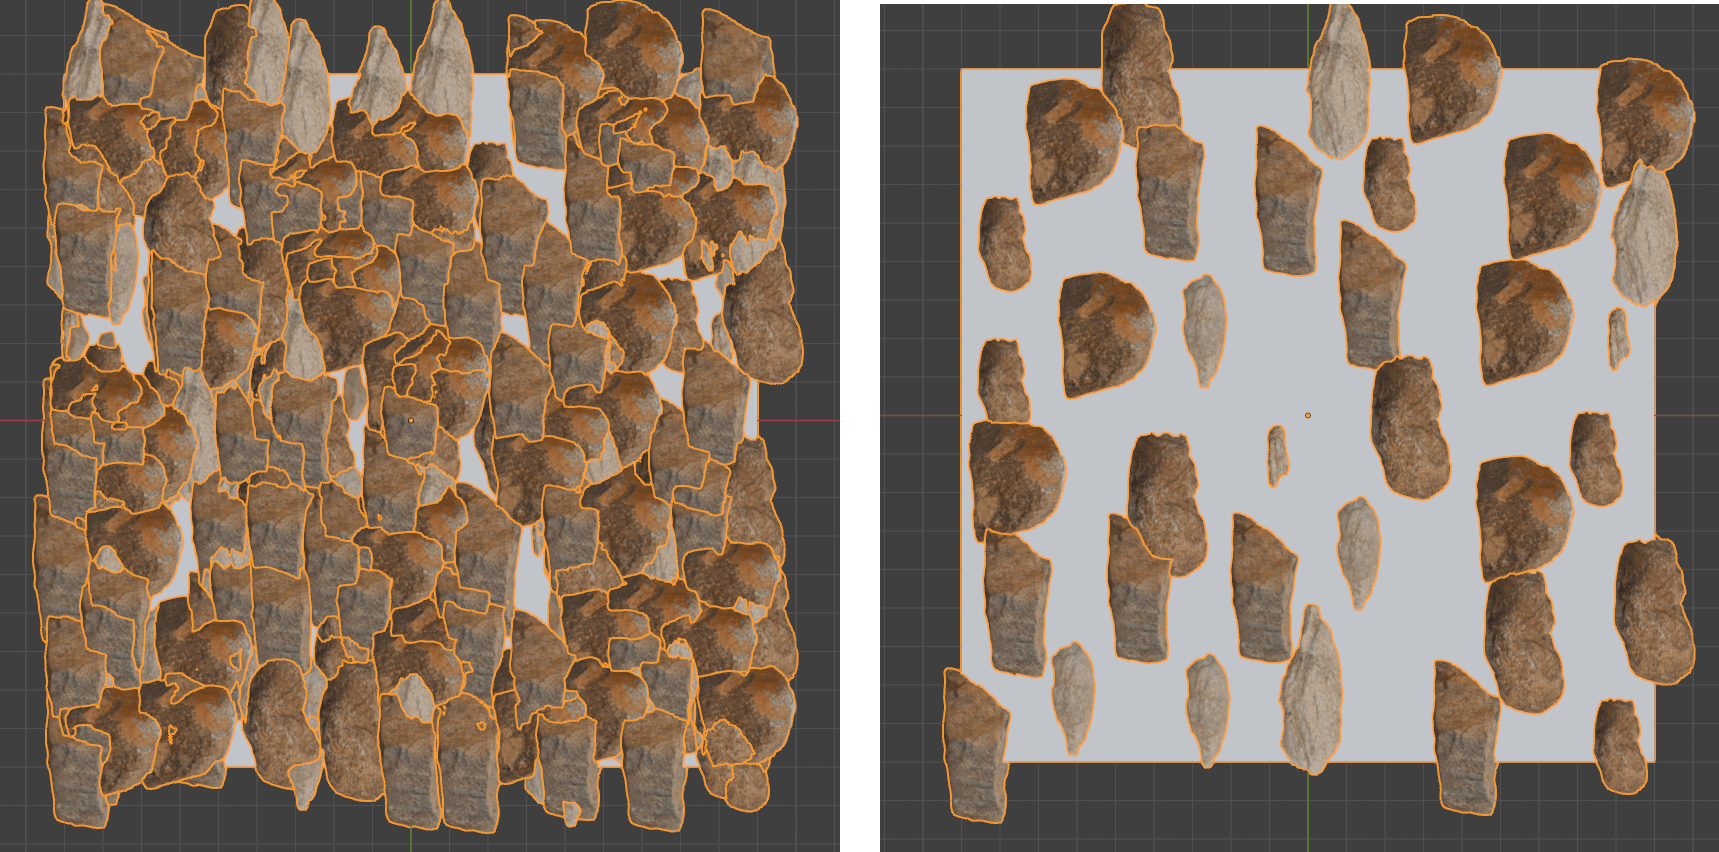
Density vs Amount:
Density: Spawns X objects per square meter. If you scale up your ground, more objects appear.
Amount: Spawns a fixed total number (e.g., exactly 50 rocks), regardless of how big the ground is.
Keep Surface: Uncheck this to hide the original ground mesh (useful if you are replacing the ground entirely with scattered objects).
Instance on Elements
Best for: Technical effects, greebling, motion graphics, wireframe styling.
This mode ignores "Area" and locks objects directly to the specific data points of your mesh's wireframe. If you edit the mesh (add a loop cut), the scattered objects will move to snap to the new geometry.
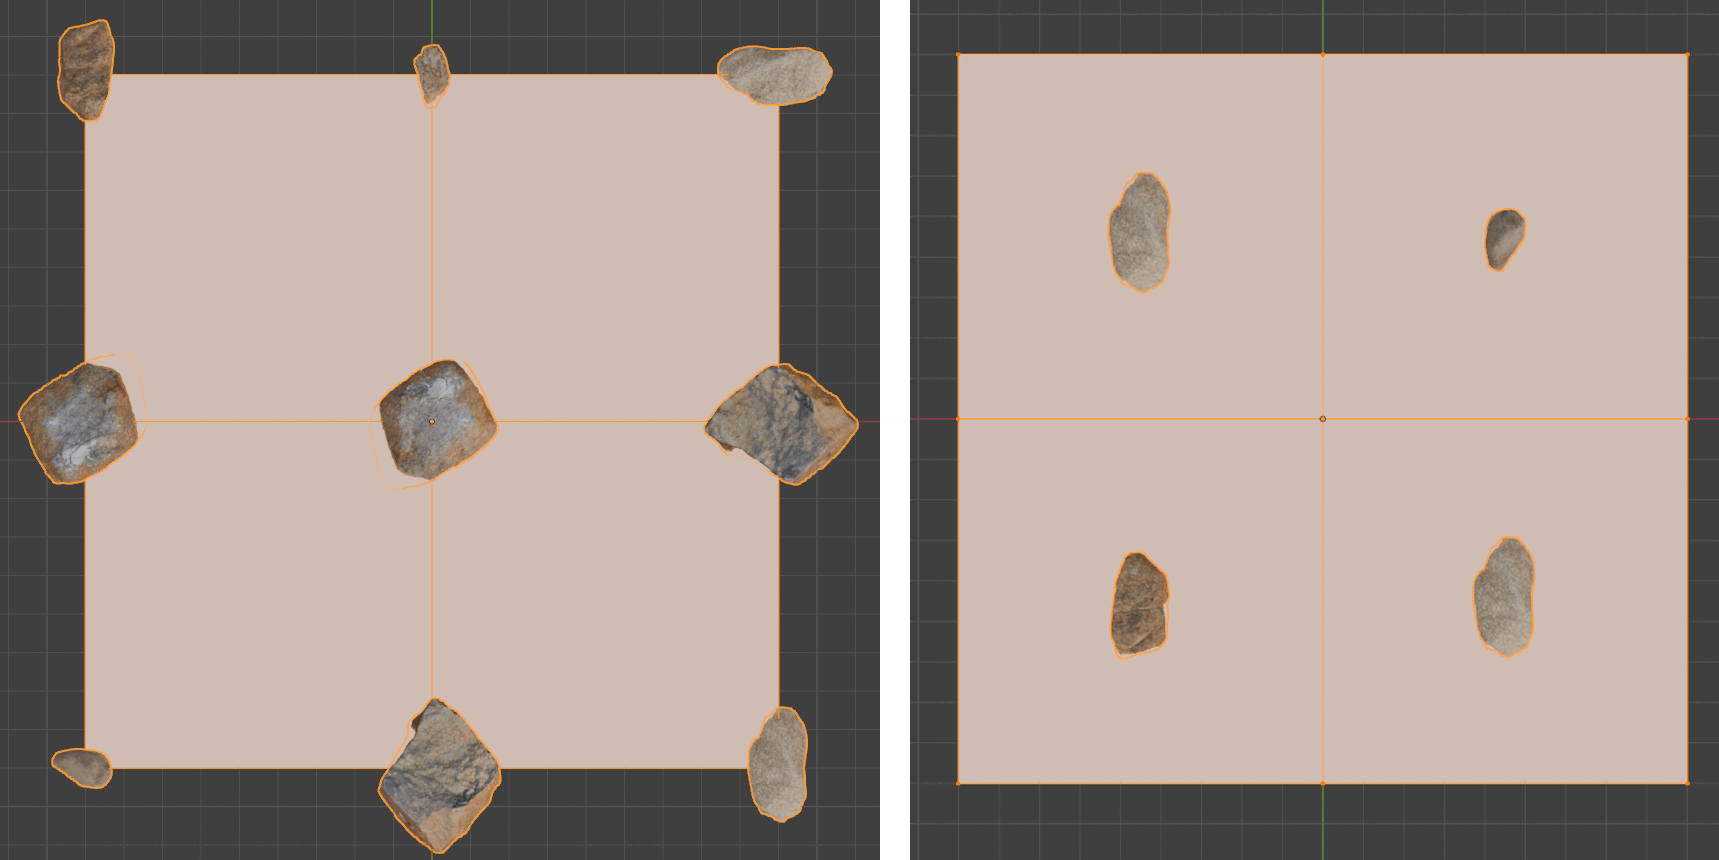
Placement Tabs:
Points: Spawns one object on every Vertex.
Edges: Spawns one object at the center of every Edge.
Faces: Spawns one object at the center of every Face.
Corners: Spawns objects at face corners (creating a "frame" effect).
Scale by Face Area:
Enabled: Objects automatically resize based on the size of the face they are on. Tiny faces get tiny objects; huge faces get huge objects.
Multiplier: Fine-tunes the sensitivity of this scaling.
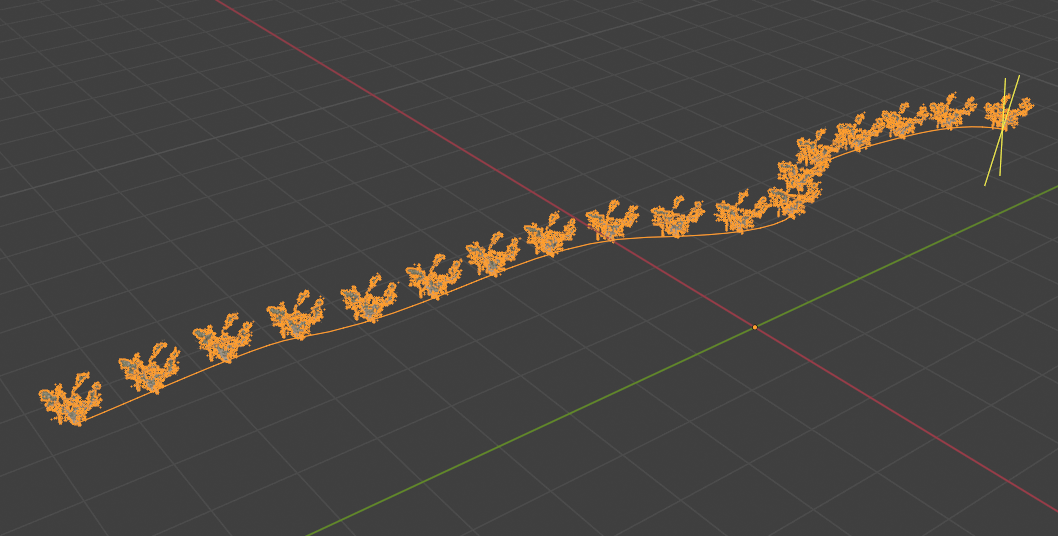
Scatter on Curve
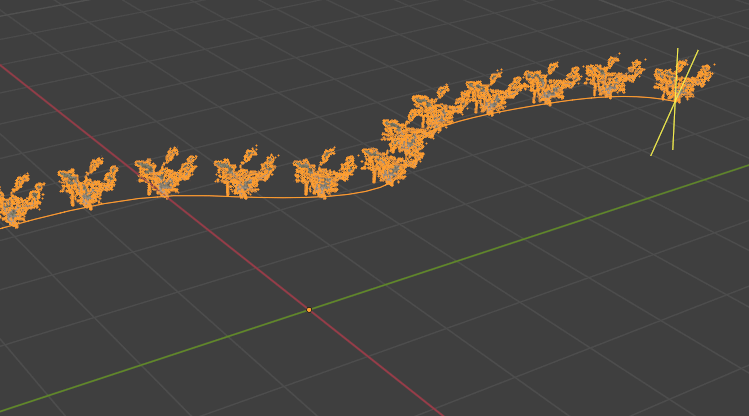
Best for: Fences, roads, chains, marching crowds, linear decoration.
If you select a Curve object (Bezier or Path) as your target, the addon switches to this mode automatically.
Count: Forces a specific number of objects to fit along the curve (e.g., exactly 10 lampposts), evenly spaced from start to finish.
Distance: Places objects at fixed real-world intervals (e.g., one fence post every 2 meters). If you extend the curve, more posts are added automatically.
Extra Resources

The buttons at the bottom of the addon can launch web browsers with the add-on’s written and video documentation, KIRI addon page or Super Hive Market page.